Chapter 8 System Setting
This chapter contains the following sections:
Firmware Upgrade
Regular firmware upgrade can obtain the newest functions and security patches, improving the performance and stability of the router, and fixing possible bugs and security risks.
WAVLINK provides two methods to upgrade your firmware: Local Upgrade and Online Upgrade. You can choose one of them to update your firmware.
Access to Advanced > Firmware Upgrade.
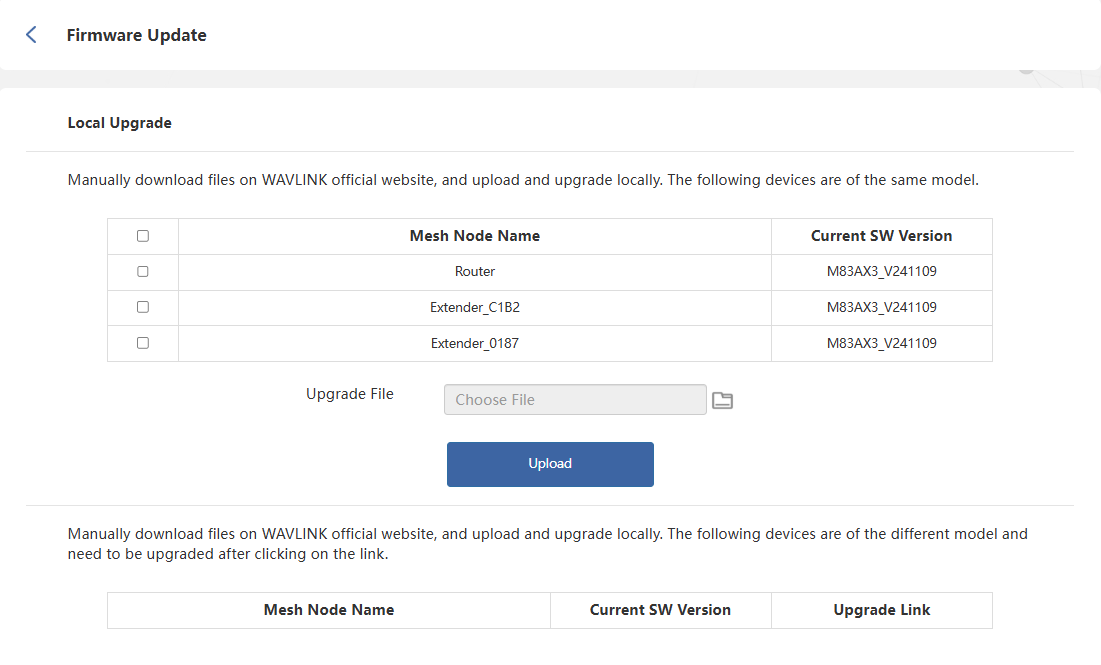
Local Upgrade
- Access to WAVLINK official website: www.wavlink.com. Download the upgrade software corresponding to your current device version.
- Select the device that needs to be updated.
- Click on Choose File or File icon, and select the firmware file that needs to be uploaded. Click on Upload.
- Wait for the upgrade process to complete.
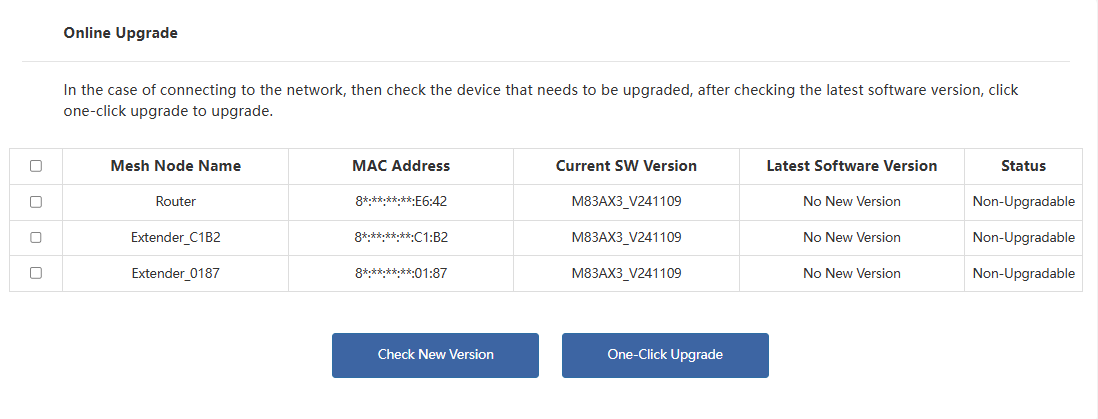
Online Upgrade
- Tick the device that needs to be updated.
- Click on Check New Version to view the upgradable version to update.
- Click One-Click Upgrade.
- Wait for the upgrade process to complete.
 Note:
Note:
- After updating, the router will automatically reboot to apply new firmware. The process will take few minutes to complete, please wait patiently.
- During updating, the router can't be powered off in case the firmware gets damaged.
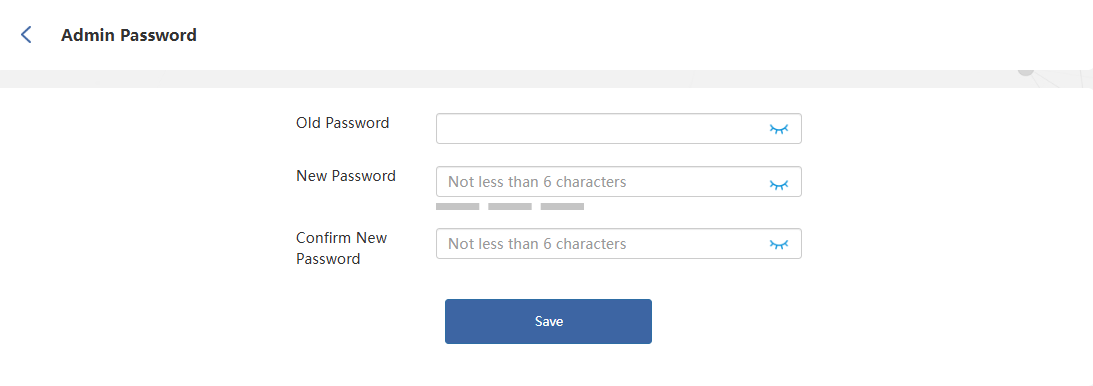
Change Admin Password
- Access to Advanced > Admin Password.
- Input the current one on the Old Password text field.
- Input the new one on the New Password and Confirm New Password text field, ensuring the inputed password is the same.
- Click on Save to complete password changing.
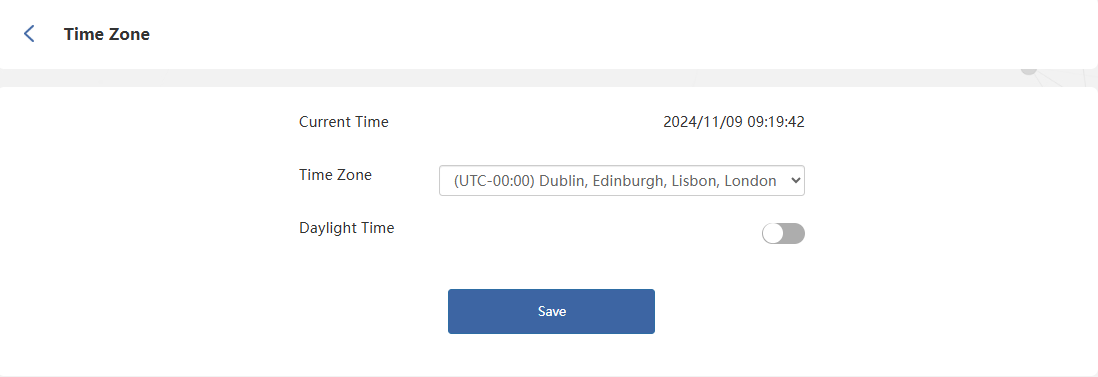
Set System Time
The system time is the time displayed during device runtime. The system time configured here will be used for other time-dependent functions, such as Wi-Fi schedules and timing reboot.
- Access to Advanced > Time Zone.
- Select the time zone from the dropdown list of Time Zone.
- Enable Daylight Time(optional).
- Click on Save to complete the configuration.
LED Control
The router's LED provide real-time feedback on the device's operational status. By observing the light color, flashing patterns, or illumination status, you can quickly determine whether the router is functioning properly and help identify potential issues. If needed, you may also enable or disable the LED indicator in the settings.
- Access to Advanced > LED Control.
- Enable/Disable LED Status.
- Click on Save to complete the configuration.

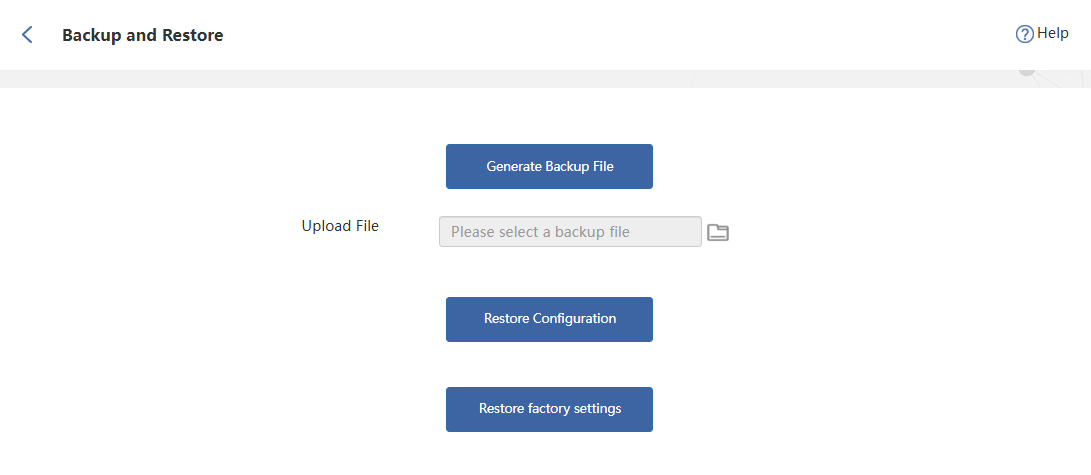
Backup and Restore
Access to Advanced > Backup and Restore.
Backup the Current Configuration of the Router
The system will automatically create a backup file containing all current configuration settings. The configuration file will then be downloaded to your computer via your browser. Please confirm saving the file when prompted in the browser dialog.
Restore the Router's Configuration
If you accidentally forget previous settings after modifying certain configuration options, you may upload a previously saved backup file to the system and click Restore Configuration to revert to earlier settings. Please note that this operation will overwrite all current configuration settings, so carefully consider before proceeding.
- Click the file icon in the backup file field, then select the configuration file you wish to restore.
- Click on Restore Configuration, and wait a few minutes to restore the configuration and restart the router.
Reset Router to Default Factory Settings
- Click on Restore factory settings to reset the router.
- Wait a few minutes for the reset and reboot.
Timing Reboot
Automatic reboots can help clear unnecessary data from your router and automatically select optimal wireless channels. Before enabling Reboot plan, ensure the system time is accurate. When router uptime is less than 60 minutes, the device will skip non-essential reboots after reaching the scheduled reboot time.
- Access to Advanced > Timing Reboot.
- Click to enable Reboot plan.
- Configure Reboot time and Reboot date.
- Click Save to complete the configurations.
