Chapter 11 System Setting
This chapter introduces firmware update, password change, system log, system time setting, indicator setting, backup and restore, and how to restart router.
It contains the following sections:
Firmware Upgrade
Regular firmware upgrade can obtain the newest functions and security patches, improving the performance and stability of the router, and fixing possible bugs and security risks.
WAVLINK provides two ways to upgrade your firmware: local upgrade and online upgrade. You can choose one of them to update your firmware.
Access to More>System>Firmware Upgrade.
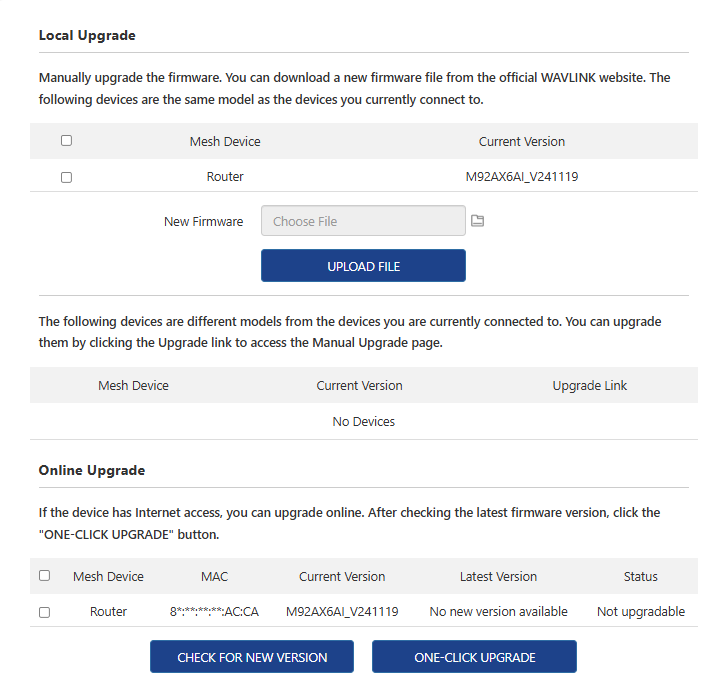
Local Upgrade
-
Access to WAVLINK official website: www.wavlink.com. Download the corresponding upgraded software of the current hardware version.
-
Select the device that needs to be updated.
-
Click on Choose File or File icon, and select the firmware file that needs to be uploaded. Click on UPLOAD FILE.
-
Wait for the completion of updating.
-
After updating, the router will automatically reboot to apply new firmware. The process will take few minutes to complete, please wait patiently.
-
During updating, the router can't be powered off in case the router's firmware gets damaged.
Online Upgrade:
-
Choose the device that needs to be updated.
-
Click on CHECK FOR NEW VERSION to view the upgradable version to update. Or directly use ONE-CLICK UPGRADE.
-
Wait for the update completion.
-
After updating, the router will automatically reboot to apply new firmware. The process will take few minutes to complete, please wait patiently.
-
During updating, the router can't be powered off in case the firmware gets damaged.
-
When CHECK FOR NEW VERSION, if the prompts show that the firmware is the newest version, there is no need to upgrade the router.
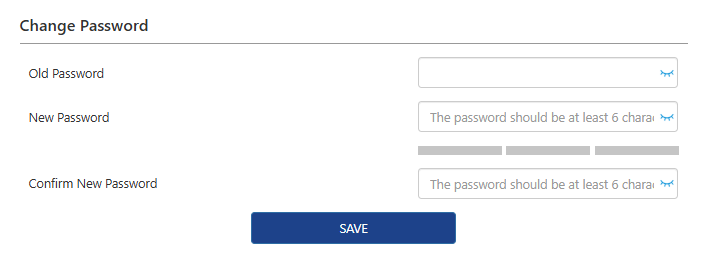
Change Password
-
Access to More>System>Change Password.
-
Input the current one on the Old Password text field.
-
Input the new one on the New Passowrd text field.
-
Input the new one on the Confirm New Password text field, ensuring the inputed password is the same as the new password.
-
Click on SAVE to complete password changing.
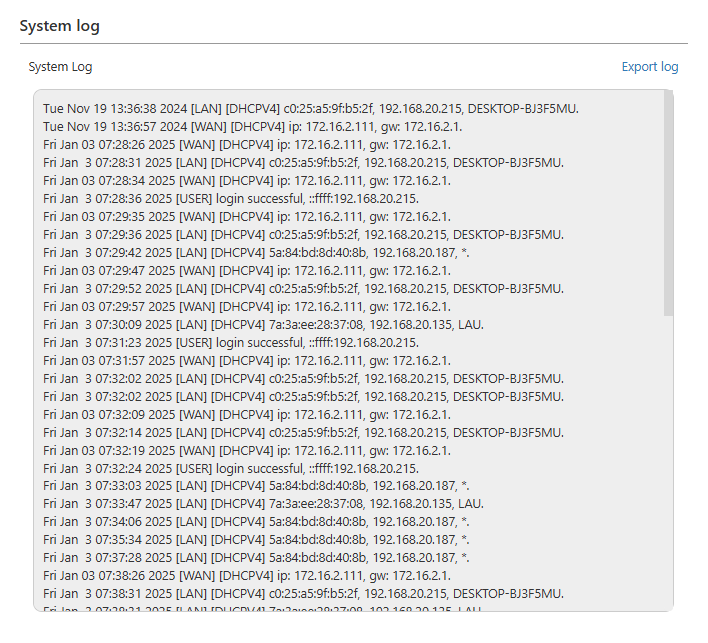
System Log
When it comes to malfunction, reserve the system log and send it to technical support for trouble shooting.
-
Access to More>System>System Log.
-
Click on Export log to save the log to the computer.
Time Zone
The system time is the time displayed when the router is running. The system time you set here is used for other time-based features, like Parental Control.

-
Access to More>System>Time Zone.
-
Choose the right time zone in the dropdwon list of Time Zone.
-
Turn on/off Daylight Saving Time(DST).
-
Click on SAVE to complete the configuration.
Led Control
The router's indicators are used for indicating the device's status or running. By setting the indicator, you can know the device's working status more clearly, find and ban machine problems in time.

-
Access to More>System>Led Control.
-
Turn on/off LED Status.
-
Click on SAVE to complete the configuration.
Backup & Restore
Please configure settings as a configuration file stored in the router. You can backup this configuration file into your computer for future use, and restore the router to the previous setting with this backup file. Furthermore, if necessary, you can delete the current system setting and reset the router to the default factory settings.
Access to More>System>Backup & Restore.

Backup the current configuration of the router
Click on GENERATE BACKUP FILE to store the copy of current setting on the local computer, and name the file backupsettings.
Restore the router's configuration:
-
Click on UPLOAD, and choose the backup configuration file that was stored on the computer.
-
Click on RESTORE CONFIGURATION, and wait a few minutes to restore the configuration and restart the router.
Reset the router to the default factory settings
-
Click on RESTORE FACTORY SETTINGS to reset the router.
-
Wait a few minutes for the reset and reboot.
Scheduled Reboot
When your router has a network malfunction, you can try to use the reboot function to solve the problem. Sometimes, the router may experience software errors or memory overflow issues, leading to network instability. Under these circumstances, you can reboot the router to solve this problem and get the network back up.
After modifying some settings of this router, you need to reboot the router to make the settings valid. Using the reboot function can quickly update the router's settings and make it valid.
-
Access to More>System>Scheduled Reboot.
-
Click on ROUTER REBOOT.

- After clicking, a window will pop up, in which you will be asked whether to restart the router or not. If you want to reboot the router, choose OK. If not, choose Cancel.
Set Scheduled Reboot Plan

The automatic reboot function can clear unnecessary data in the router and automatically choose the best wireless channel.
Before turning on Reboot Plan, please ensure the system time is right. If the router's designated reboot time is less than 60 minutes, some unnecessary reboots won't be executed.
1.Access to More>System>Scheduled Reboot.
2.Turn on Reboot Plan.
3.Choose the router's Reboot Time, and the Reboot Date to decide on reboot frequency.
4.Click on SAVE to complete the configuration.