Chapter 2 Connection and Resolution
This chapter introduces driver installation, he steps of connecting the dock and display resolution.
It contains the following sections :
Driver Installation
For Windows 10/11/Later and MAC OS, it is Plug and Play, so Driver can be installed automatically. If the Network Driver cannot be installed automatically or the network port cannot be recognized, please visit www.wavlink.com/en_us/WL-UMD27-Pro or www.wavlink.com > SUPPORT > Driver > WL-UMD27-Pro to download and manually install the Driver.
Connection
Note: Before connecting to the Dock, please ensure the USB-C port of the PC/Laptop supports PD and DP ALT MODE. Failure to meet this requirement will result in non-functional charging and video ports.
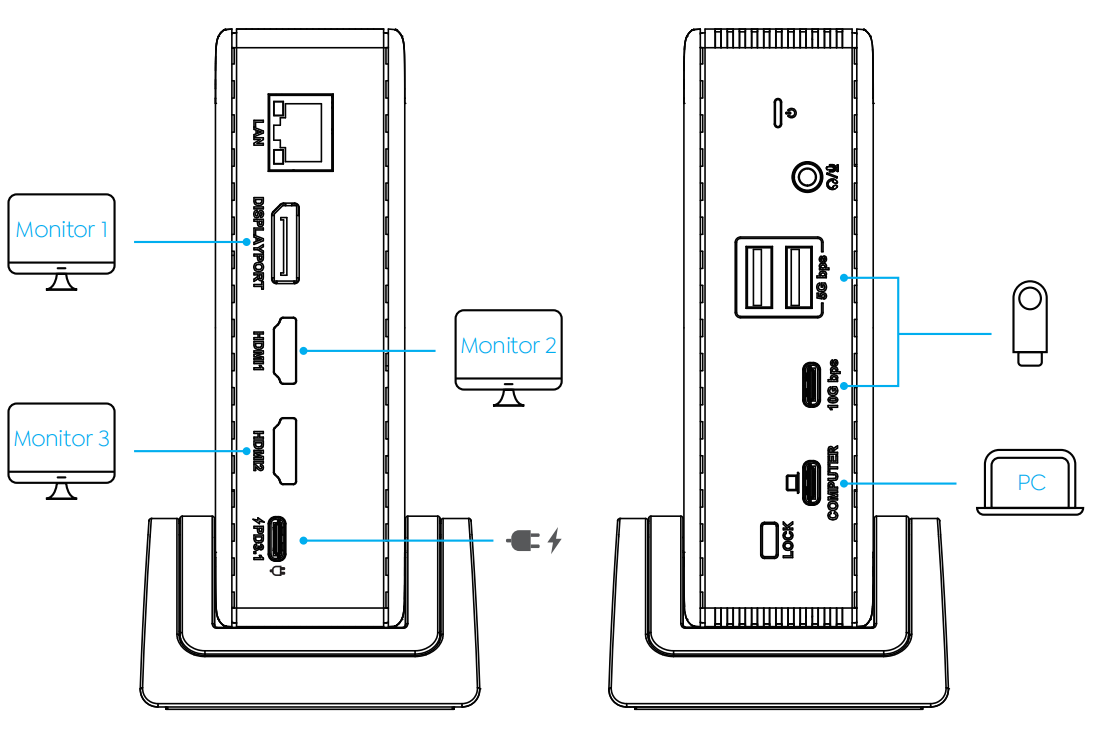
- Step 1: Connect the power adapter to the dock’s USB-C PD IN port.
- Step 2: Connect the USB-C upstream port on the docking station to your laptop.
- Step 3: Connect the external monitors to the DP/HDMI 1/HDMI 2 port.
- Step 4: Connect USB peripherals to USB-A/USB-C ports according to your needs.
Display Resolution
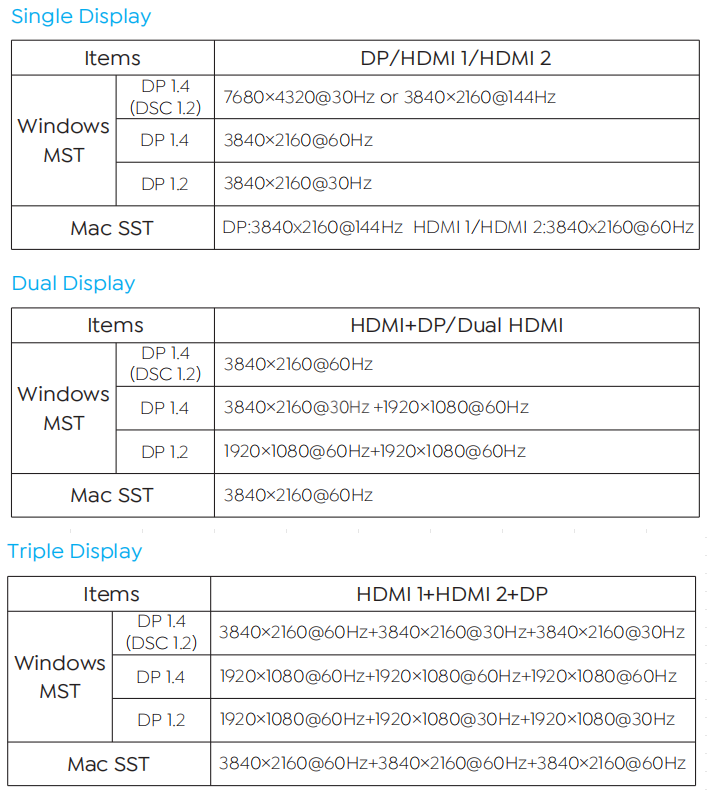
-
The above resolution are factory test results; The resolution may be different depending on the actual situation of the computer and monitor.
-
If you want to use the 3 displays with your PC/laptop simultaneously, please make sure that the Graphics card supports at least 4 displays, including your PC's own screen. Check with your PC manufacturer on this.
-
Remarks for Mac based PC/laptop: Mac OS supports Single-Stream Transport mode, so only one video source can be output such as ABB or ABBB(A is the primary display).
