Chapter 2 Initial Setup Guide
This chapter contains the following sections :
• Configure the Router via Web Browser
Prepare the Modem
-
Unplug the power adapter from your DSL modem. If the modem has backup battery, please remove it.
Note : If using a DSL Internet connection, obtain the login credentials(username/password) from your Internet Service Provider (lSP) to properly configure your wireless router.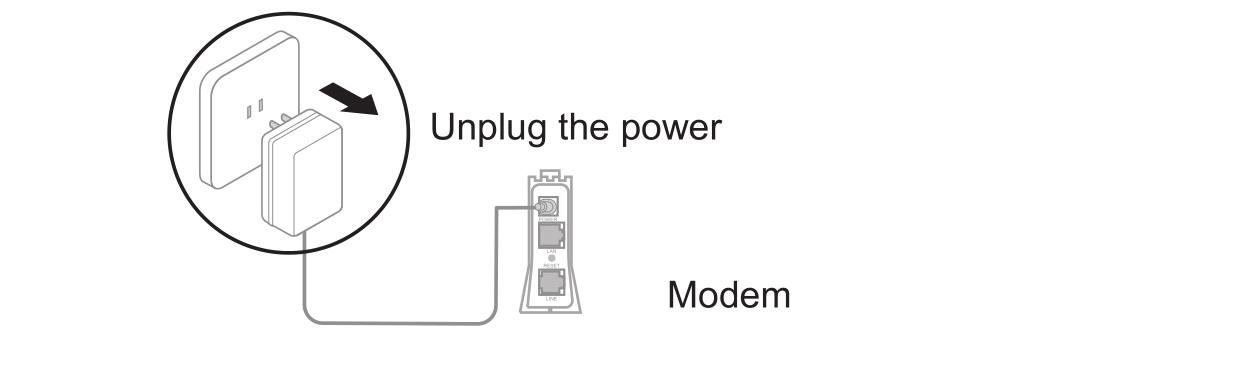
-
Use the provied Ethernet cable to connect the modem to the WAN port of the router.
-
Plug the modem into a power outlet and turn it on.
-
Check the indicator lights on the modem to confirm a stable internet connection.
Install Your Router
- Insert the power adapter into the router’s DC IN port and press the power switch (if applicable; some models lack a physical switch).

- Wait for about 2-3 minutes, then the router is ready.
Configure the Router via Web Browser
- Wired Connection: Use another Ethernet cable to connect your computer to one of the LAN ports on the router.

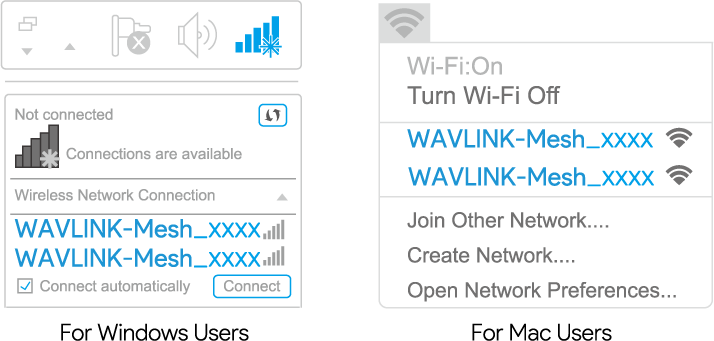
- Wireless Connection: On your laptop or smartphone, connect to the default SSID printed on the router: WAVLINK-Mesh_XXXX.
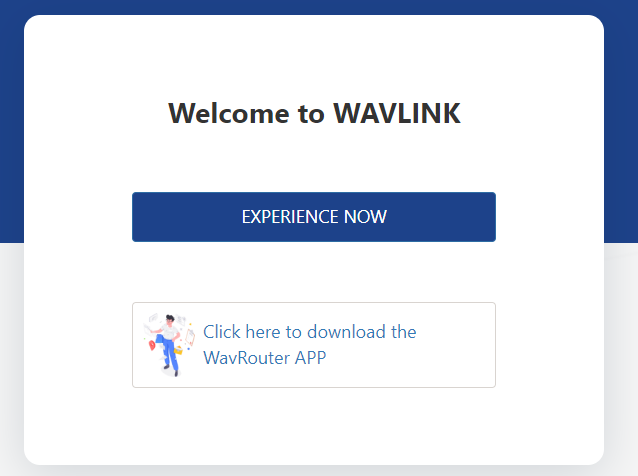
- Open a web browser(via wired or wireless connection) and enter http://wavlogin.link in the address bar. You will automatically enter the Wavlink router initial setup page. If not, manually enter 192.168.20.1 in the browser’s address bar and follow the instructions.
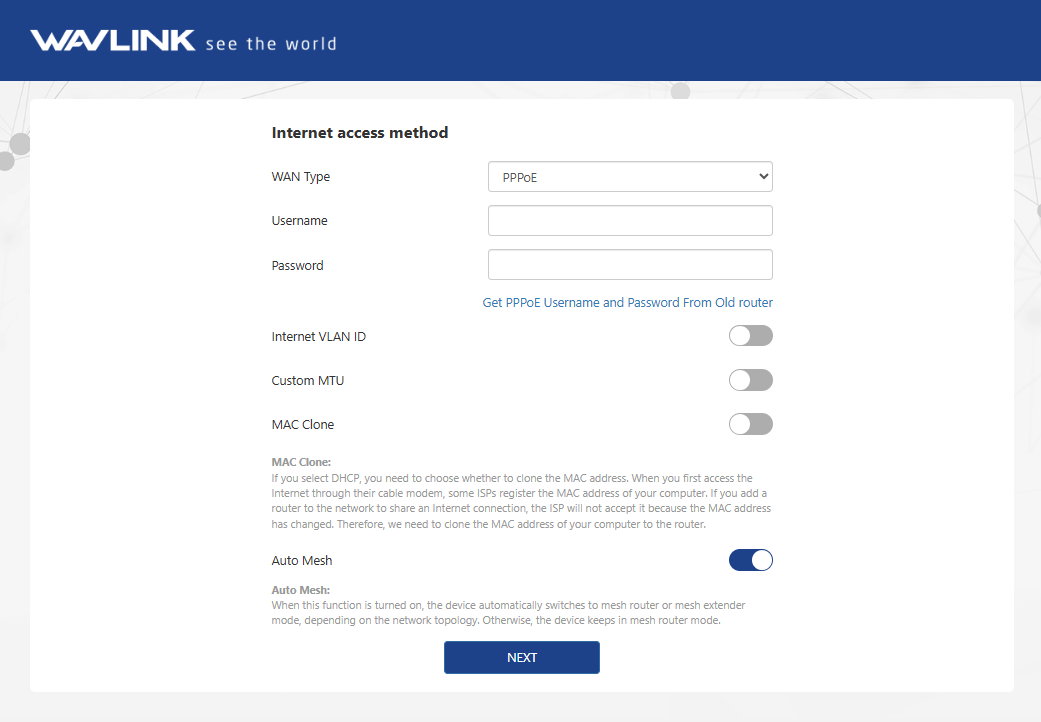
- It is Router Mode by default. Select the corresponding WAN Type.
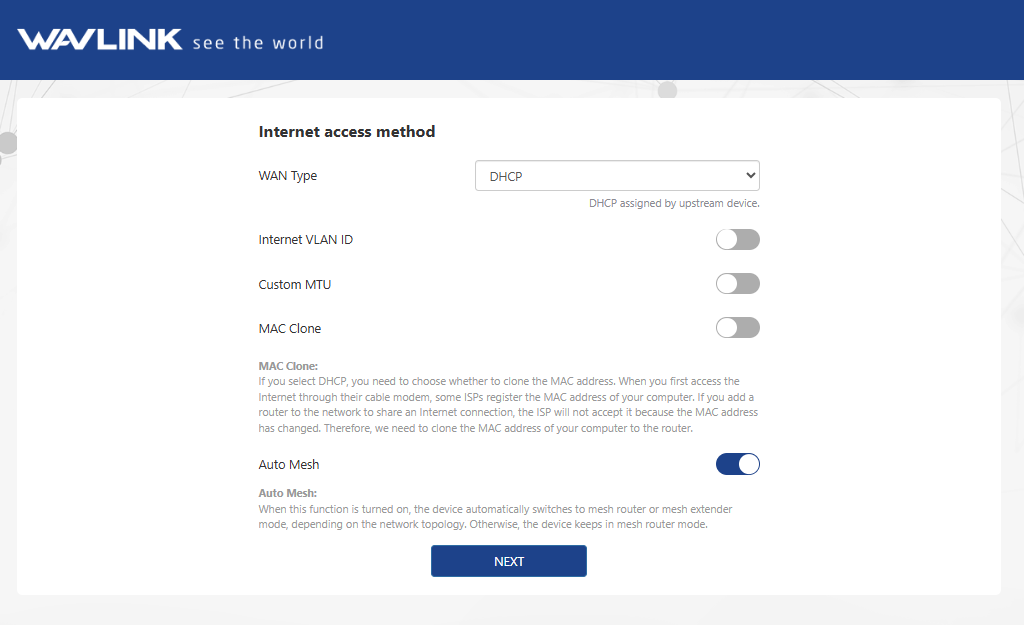 ① If you choose DHCP, you will need to decide whether to enable the MAC clone. Some ISPs register the MAC address of your computer when you firstly access the Internet through their cable modem, we need to clone the MAC address of your computer to the router. The Custom MTU(Maximum Transmission Unit) is the largest size of a data packet that can be transmitted over the network. If your ISP requires you to adjust the MTU size, enable this option. Otherwise, we recommend you to keep it disabled for optimal network performance.
② If you choose PPPoE, enter the Username and Password provided by your ISP. PPPoE is usually designed for such as DSL or fiber optics.
 ③ If you choose Static IP, enter a specified IP parameters including IP address, Subnet Mask, Gateway, DNS1 and DNS2 provided by your ISP.
-e1751fd291db1559ddcba56695a3ff5e.png)
- Click NEXT.
- Choose Country/Region and Time Zone, and set Wi-Fi Name and Wi-Fi Password.
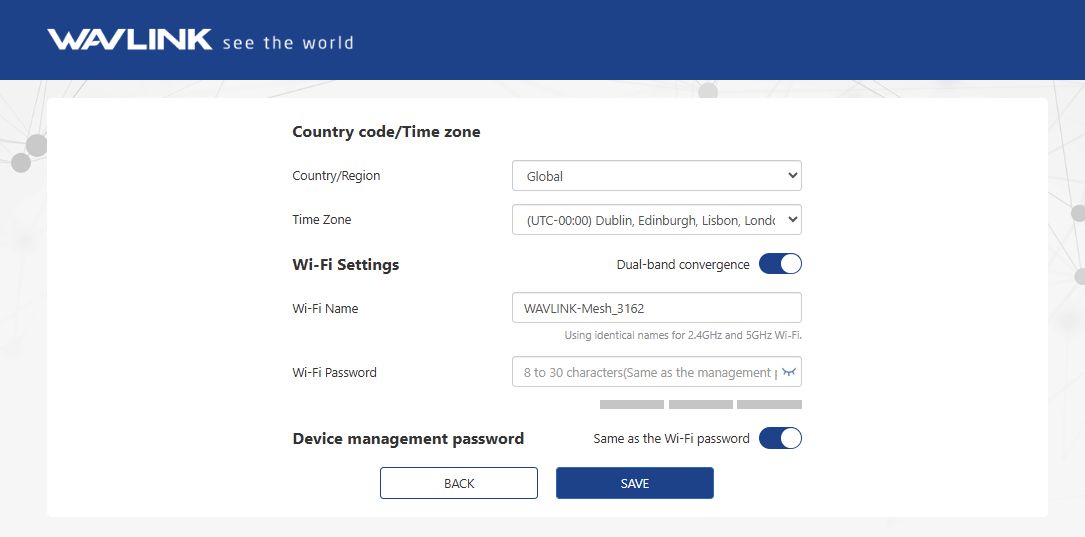
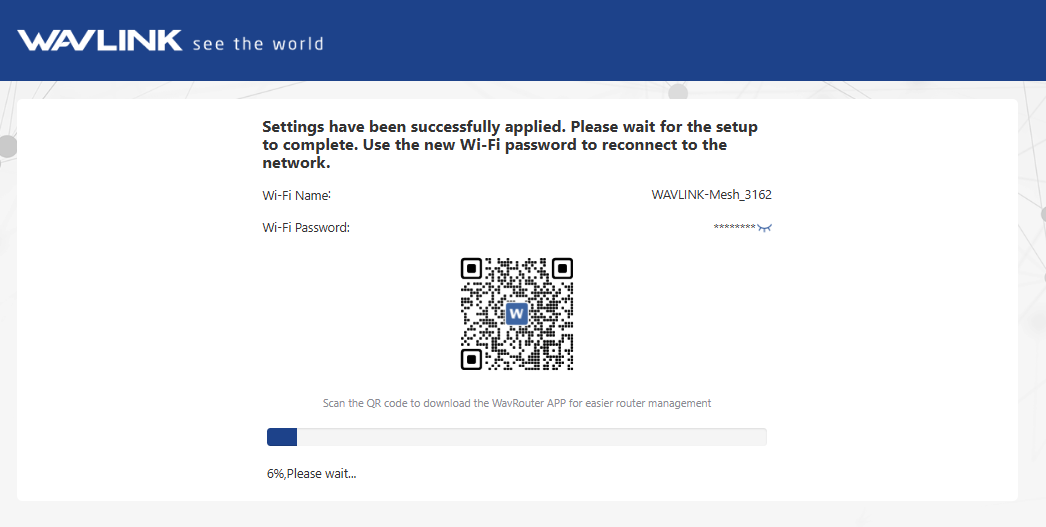
- Click SAVE and wait the settings to be successfully applied. Then use the new Wi-Fi password to reconnect to the network.