Chapter 2 How to Use
This chapter contains the following sections :
• Power On
How to Use
To install SSD in the M.2 slot, follow SSD Installation; if not using the M.2 slot, refer to steps from Power on to Connecting to the Monitor.
SSD Installation
-
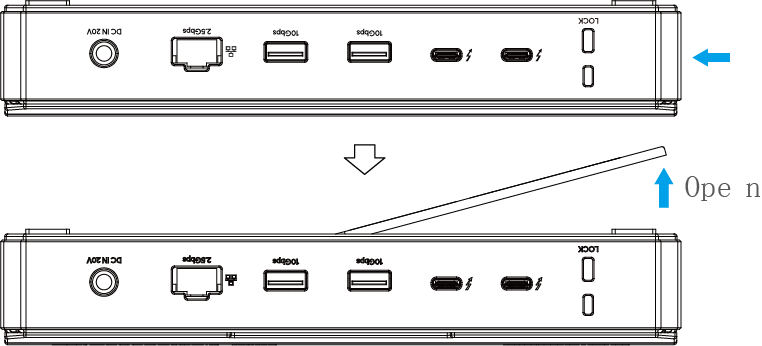
Use a screwdriver to unscrew the screws on the back cover.

-
Lift the top cover of the enclosure from the end and remove it.
-
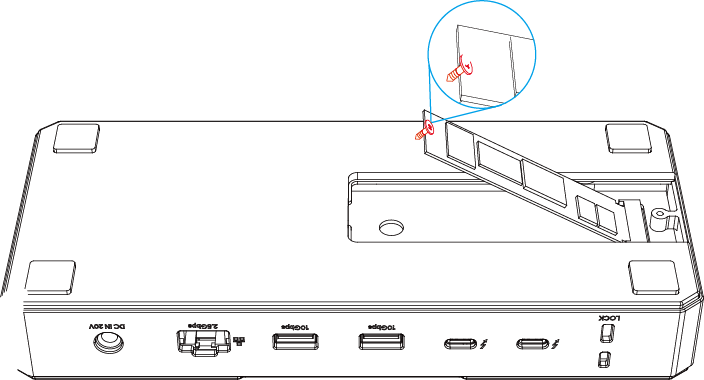
At a 45° angle, slide in your SSD until it is fully seated align with the edge. Align the screw with the mounting interface on the SSD and screw it into place using screwdriver.
-
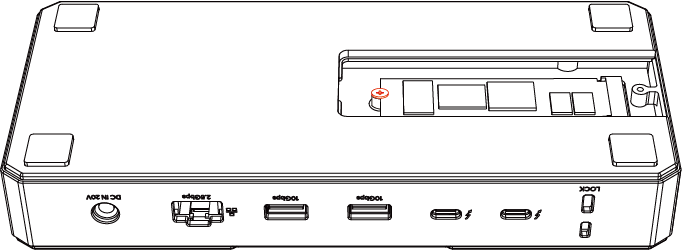
Peel off the protective films on both sides of thermal silicone pad and stick it to SSD.
-
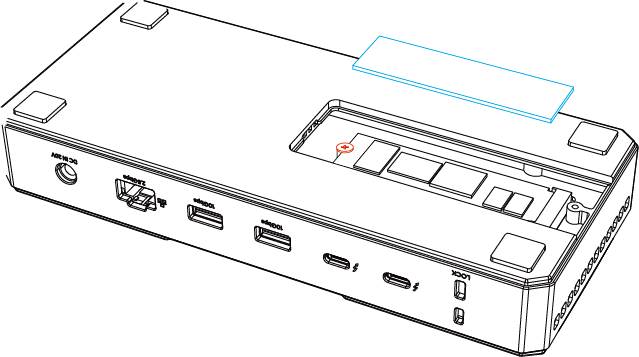
Reassemble the cover after aligning the contacts, then screw the screws on the back cover.
Power On
-
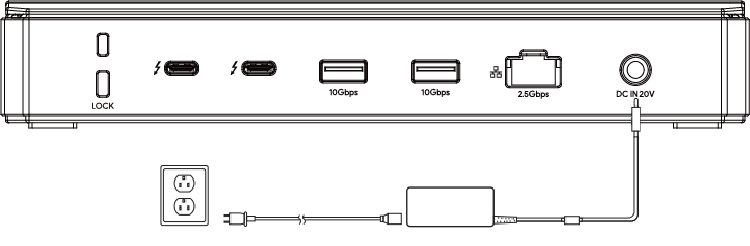
Plug one end of the equipped Power Adapter into the DC IN 20V port on the Docking Station.
-
Plug the other end of the Power Adapter to a Power Outlet.
Connecting to the Host
-
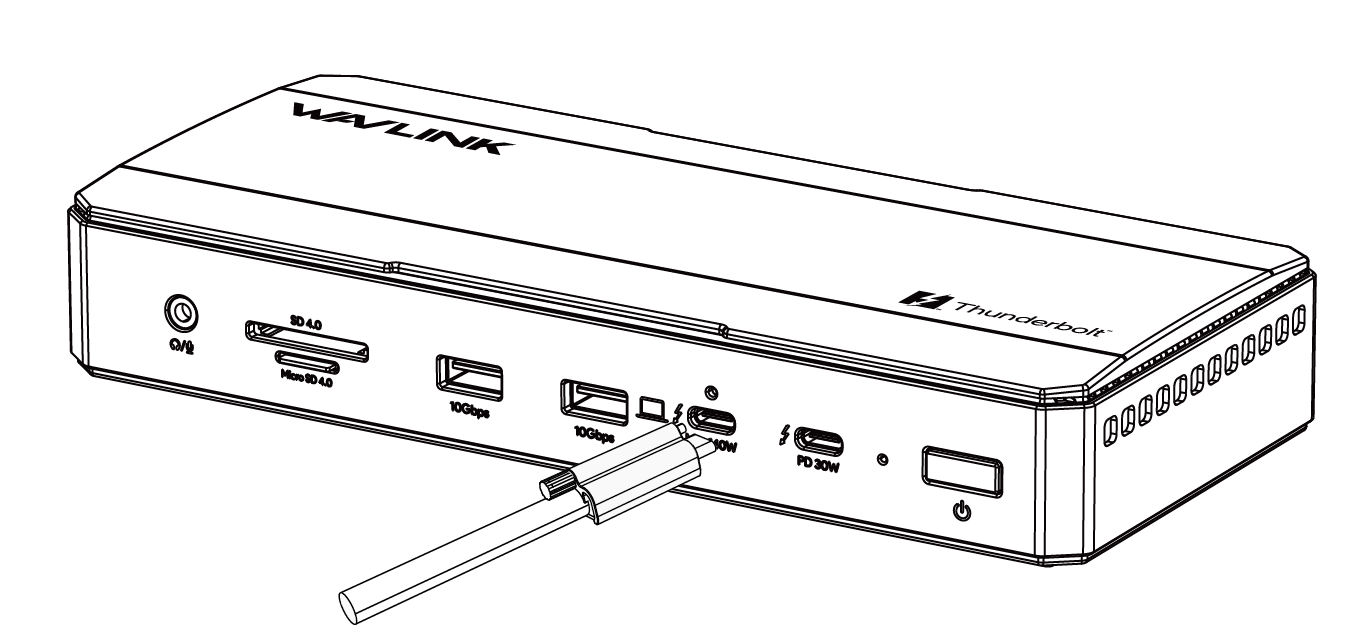
Use the provided USB-C cable to connect the USB-C Host port on the Docking Station to the Thunderbolt port on your laptop.
-
The power switch on the docking station is used to turn on/off the dock. In the initial state, when there is no host connected, the power indicator light on the docking station will display red.
-
After successfully connecting the docking station to your laptop, the power indicator will turn green, indicating a successful connection to the Host.

Make sure the cable is securely plugged in and ensure that the docking station is correctly connected to your laptop to ensure a successful connection and normal operation of the docking station.
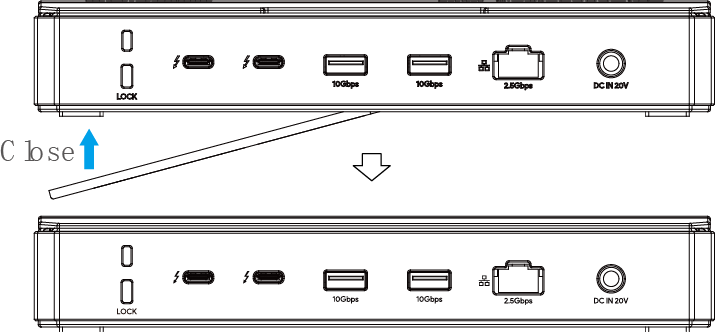
Note for Cable Holder: The cable holder is designed to tighten the USB-C cable. If you are worried that the USB-C cable might loosen, please follow the following steps to install the cable holder to the dock.
-
Insert the cable into the cable holder according to the arrow direction.

-
Align the bolt with the fixing hole, then please connect it to the USB-C Host port.
-
Tighten the screw on the cable holder to secure the cable, you can use a screwdriver as shown, tighten clockwise or loosen and remove counter-clockwise.
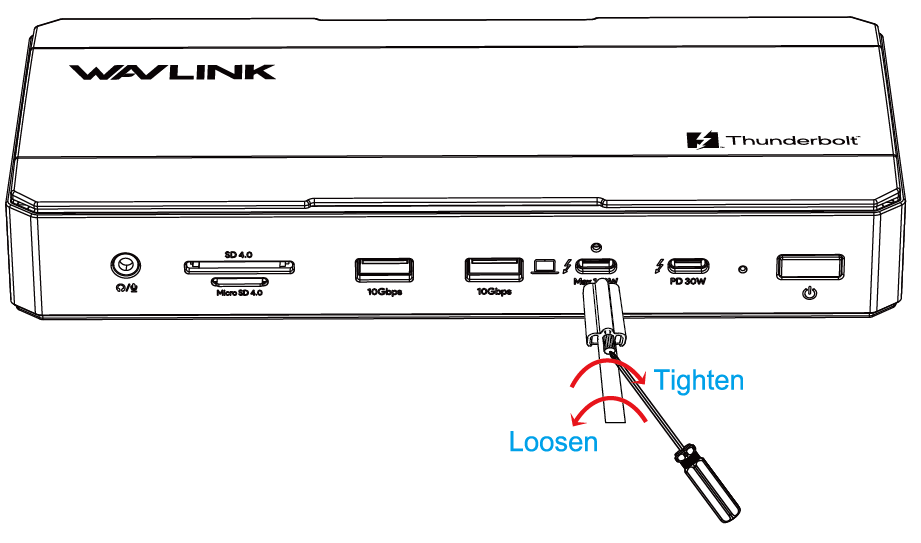
- Control the force during operation to avoid damaging the screw.
- The Cable Holder just is used for fixing the cable to prevent accidental touch and loosening. After assembling it, please do not pull it hard to avoid damage to the interface, please follow the above instructions if you need to disassemble it.
Connecting to the Monitor
Connect the monitors to the three downstream Thunderbolt 5 ports, which support data transfer, PD power supply, the maximum resolution and refresh rate specifications are as follows:
Single Dsiplay
| Display Mode | Video Port 1 | Video Port 2 | Video Port 3 |
|---|---|---|---|
| Single Display(DSC) | 7680×4320@144Hz | 7680×4320@144Hz | 7680×4320@144Hz |
Dual Display
| Display Mode | Video Port 1 + Video Port 2 | Video Port 1 + Video Port 3 | Video Port 2 + Video Port 3 |
|---|---|---|---|
| Dual Display(DSC) | For Windows:7680×4320@60Hz + 7680×4320@60Hz For Mac: 6144×3456@60Hz+6144×3456@60Hz | For Windows:7680×4320@60Hz + 7680×4320@60Hz For Mac: 6144×3456@60Hz + 6144×3456@60Hz | For Windows:7680×4320@60Hz + 7680×4320@60Hz For Mac: 6144×3456@60Hz + 6144×3456@60Hz |
Triple Display
| Display Mode | Video Port 1 + Video Port 2 + Video Port 3 |
|---|---|
| Triple Display(DSC) | 3840×2160@144Hz + 3840×2160@144Hz + 3840×2160@144Hz |
Note:
- The host computer must support Thunderbolt 5 and DP2.1 to output three displays. If it only supports one or two video outputs, the product will also output accordingly.
- The actual output capability may vary depending on your computer's system, software, hardware and others.