Chapter 2 How to Use
This chapter contains the following sections :
• Assembly
Assembly
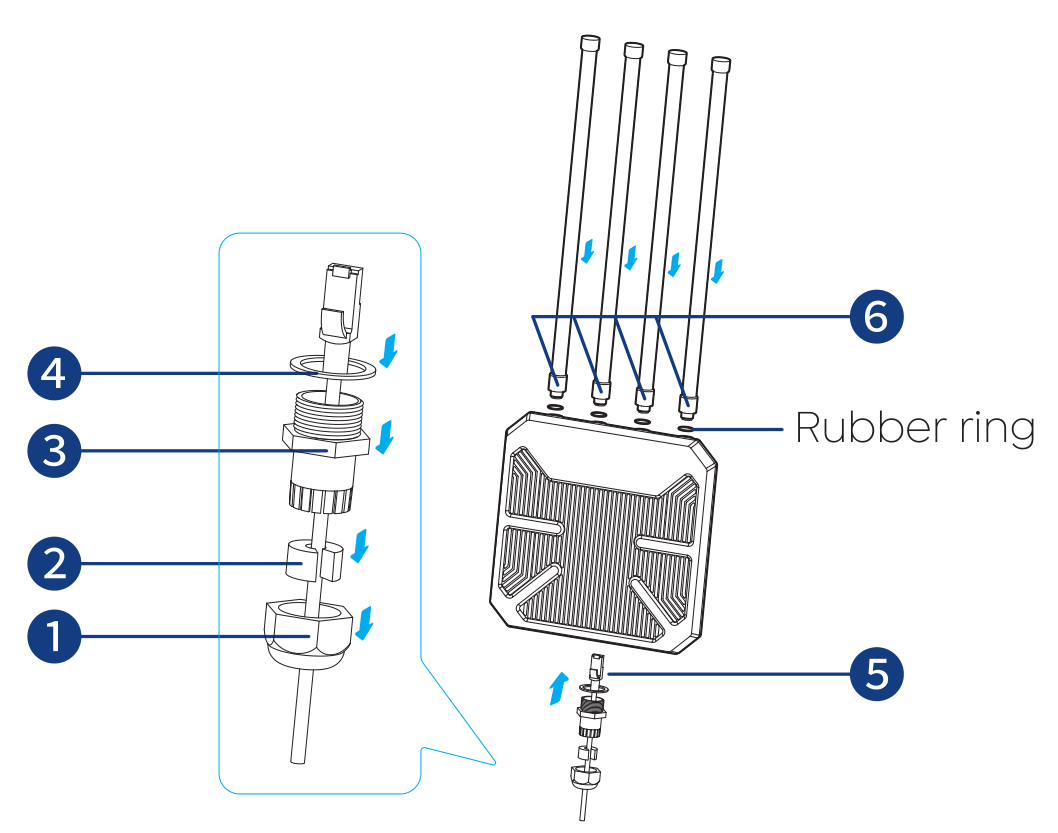
① Pass the Ethernet cable through the hex cap.
② Open the cut part of the sealing plug, and then pass the Ethernet cable through it.
③ Pass the Ethernet cable through the hex stud.
④ Pass the Ethernet cable through the sealing ring.
⑤ Connect the Ethernet cable to the WAN Port.
⑥ Screw the omni antennas into the 2.4G and 5G antenna connectors.
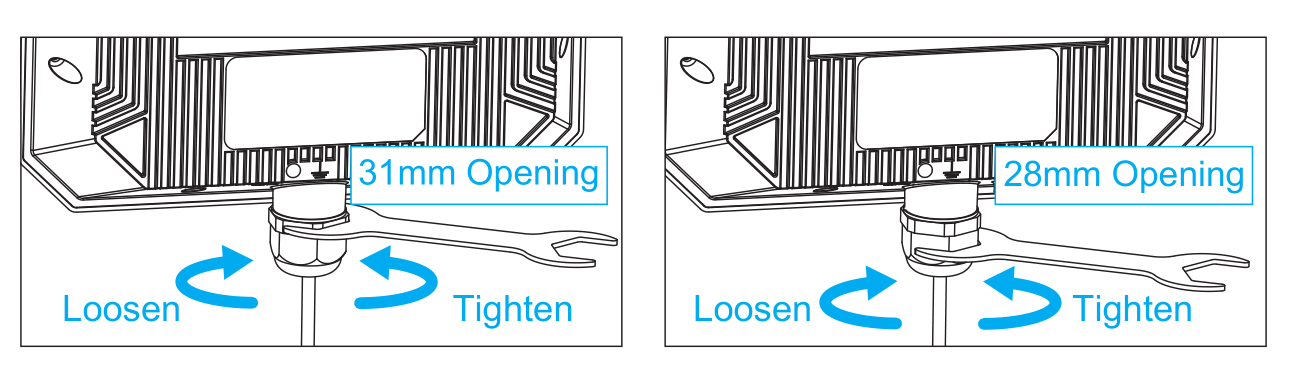
Installation
2.1 Outdoor Installation
Fix the device to the post with hose clamps, or fix the device to the wall with screws.
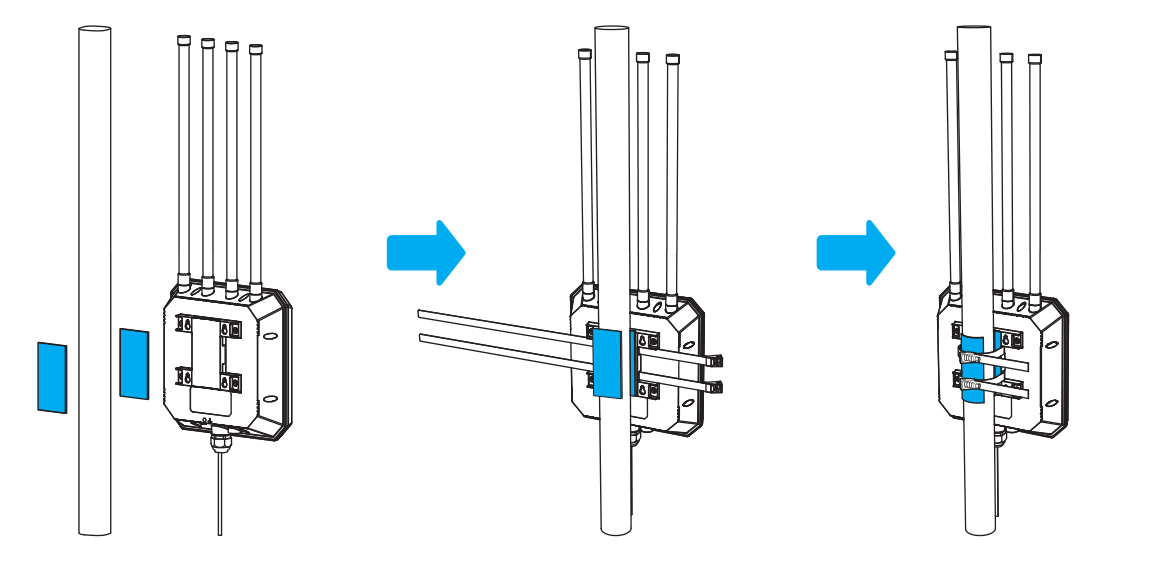
Step 1: Stick two silicone pads.
Step 2: Thread the hose clamps.
Step 3: Tighten the hose clamps.
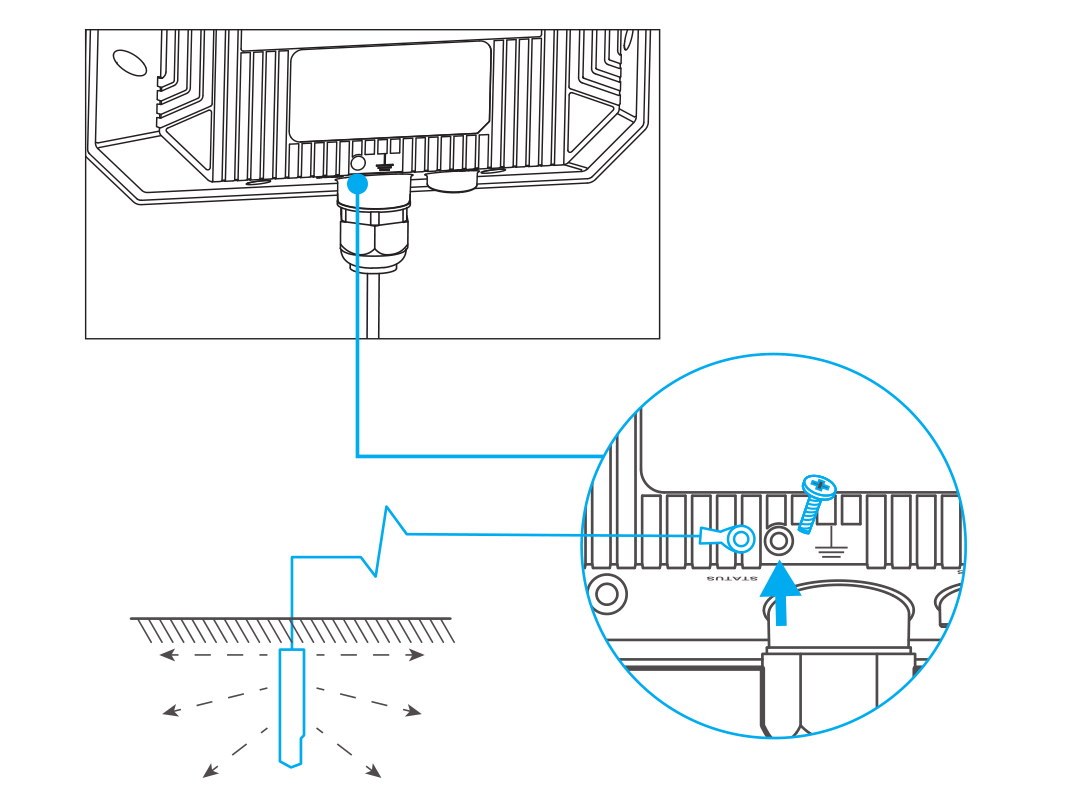
Suggestion: grounding wire's copper core: ≥ 6mm²;
grounding pin's burial depth: ≥ 0.8m.
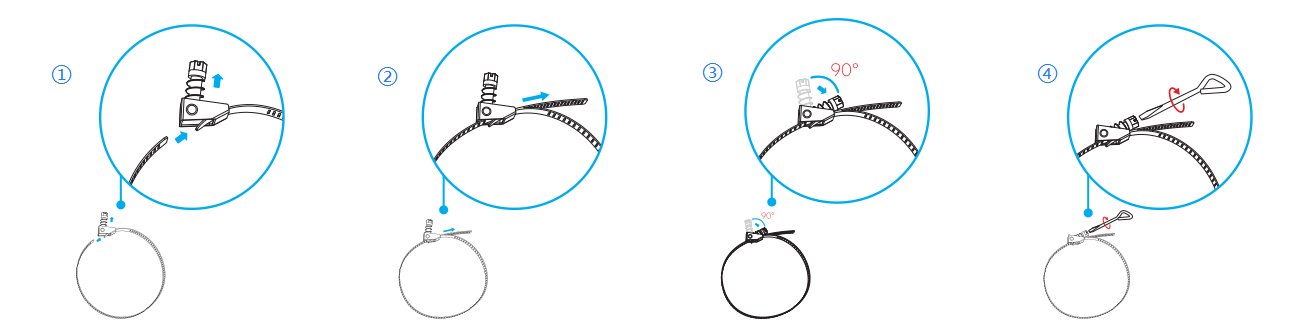
① Turn the screw upwards by 90°.
② Thread the strap through the hole at the bottom of the fastener and pull the strap tightly.
③ Turn the screw downwards by 90° to lock the fastener.
④ Turn the screw clockwise to tighten the fastener by using the screwdriver.
Connection
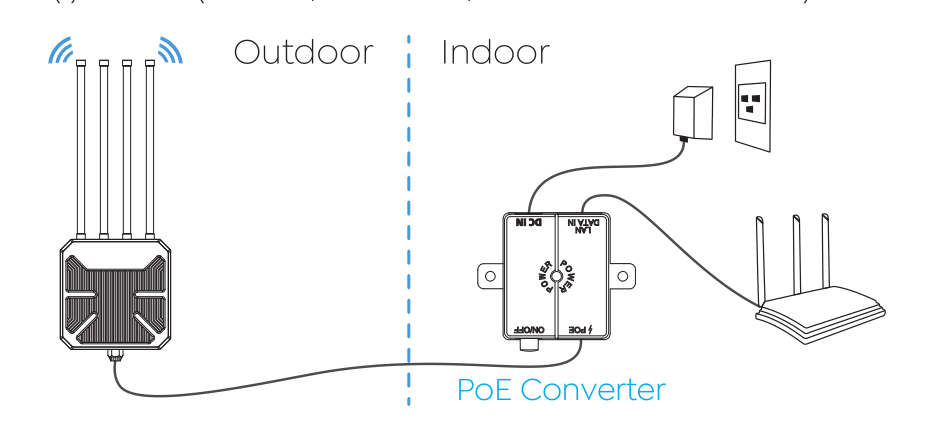
Passive PoE
(1) Wired (For AP/Mesh AP/Mesh Router Mode)
(2) Wireless (For Repeater/Mesh Extender Mode)
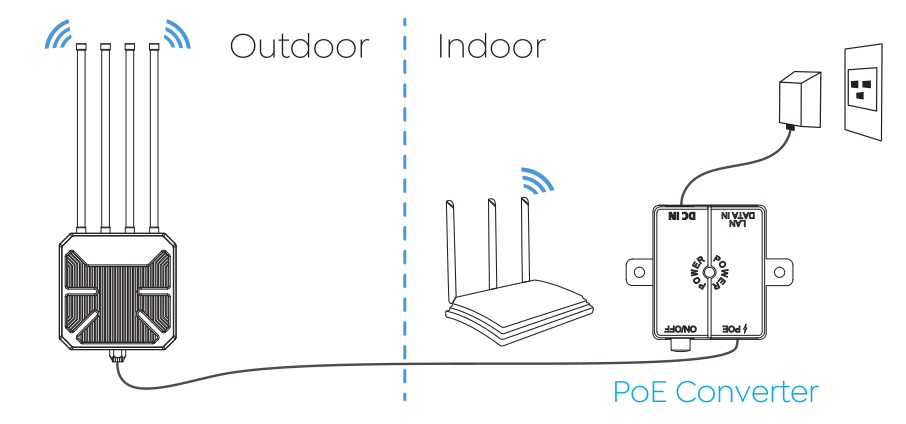
① Connect the “PoE” port of the PoE converter with an Ethernet cable to the “WAN” port of the device. ② Connect the PoE converter to power source.
Note: The PoE converter is not waterproof. Please place the “PoE” port facing downwards to avoid water from flowing into the converter.
Active PoE (For AP/Mesh AP/Mesh Router Mode)
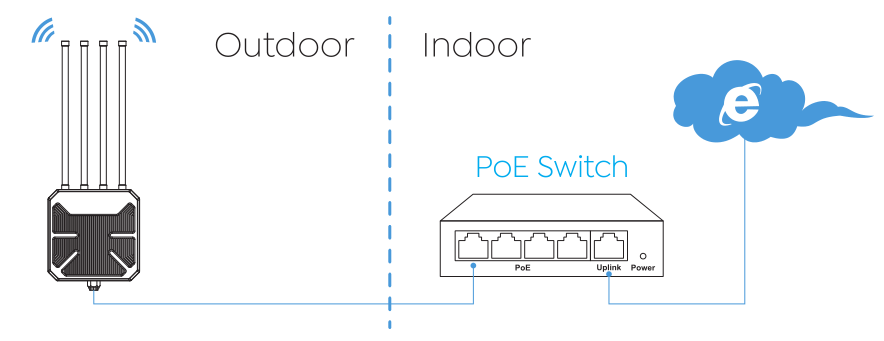
Attention: ① Make sure you use a certified CAT6 or higher standard Ethernet cable with RJ45 connectors.
② Make sure the Ethernet cable length is less than 100 meters (328 feet).
Configuration
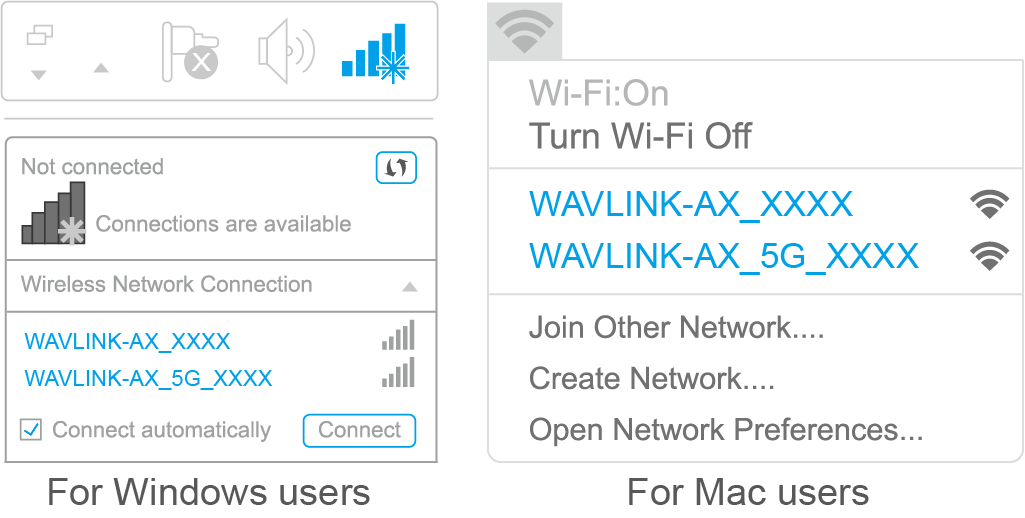
Via Wireless
① Disconnect the Ethernet cable from your computer (if you have one).
② Turn on your WiFi, find and connect the SSID of this product.
Via Cable
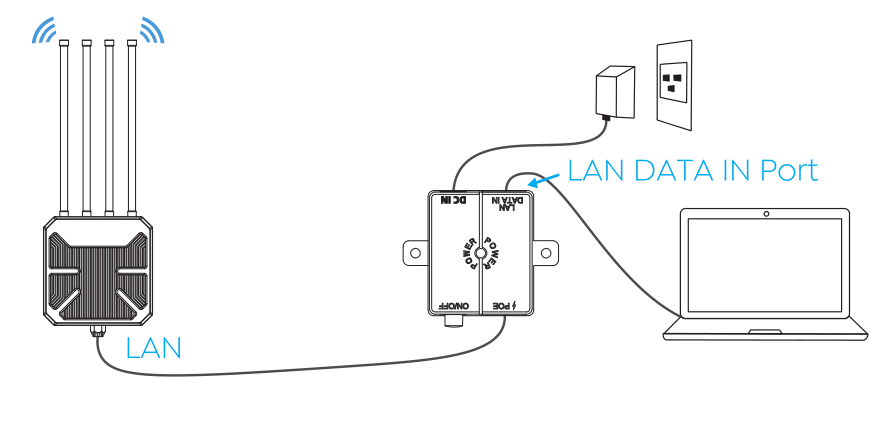
Connect the Ethernet cable to your PC/laptop and the LAN DATA IN port of your PoE converter, and then you can start configuring the device.
The above steps are the operations for the FAT AP mode. For the operation of FIT AP mode, please go to the last chapter for the details.
If you want to use this device's AP/Router Mode function, please finish the configuration of AP/Router Mode, and then connect the LAN DATA IN of the PoE converter port to the LAN port of the upstream router.
Setting up the Device
① The login page will pop up when the router is connected to your devices for the first time. You can also launch a browser from your computer or smartphone and enter http://waplogin.link or 192.168.30.1 into the address bar.
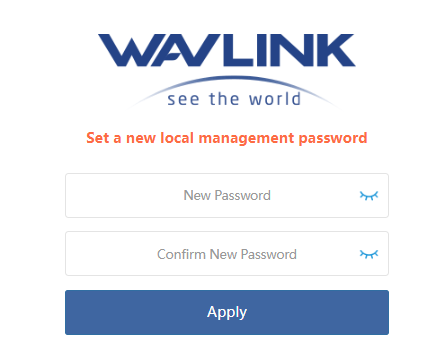
② Please enter your password to login the web again and start the setup.

③ Select your Country/Region and Time Zone.
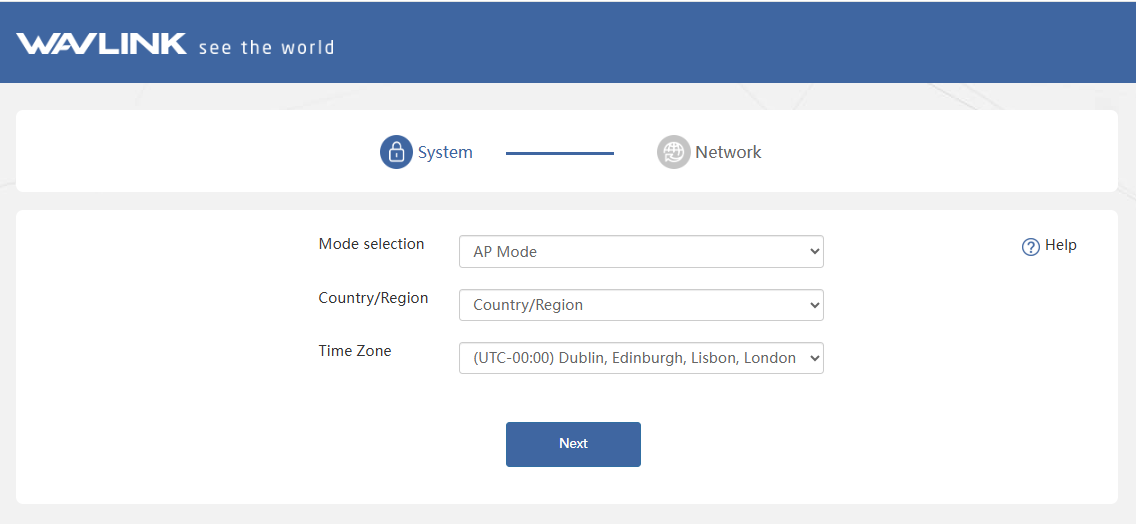
Mode Selection
This product supports 5 modes.
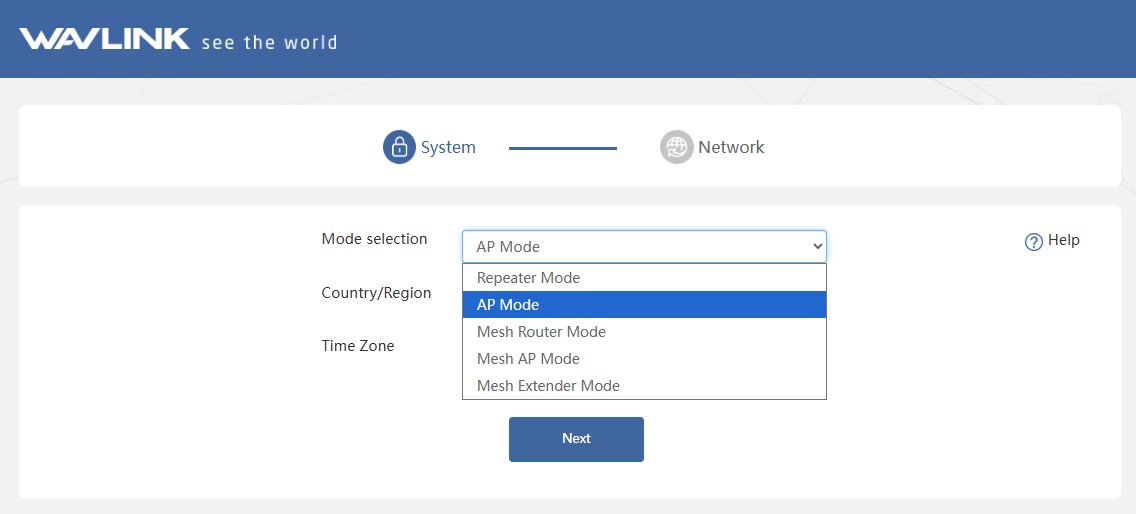
AP Mode

- The system selects AP mode by default, there is no need to select the AP mode manually. Click Next.
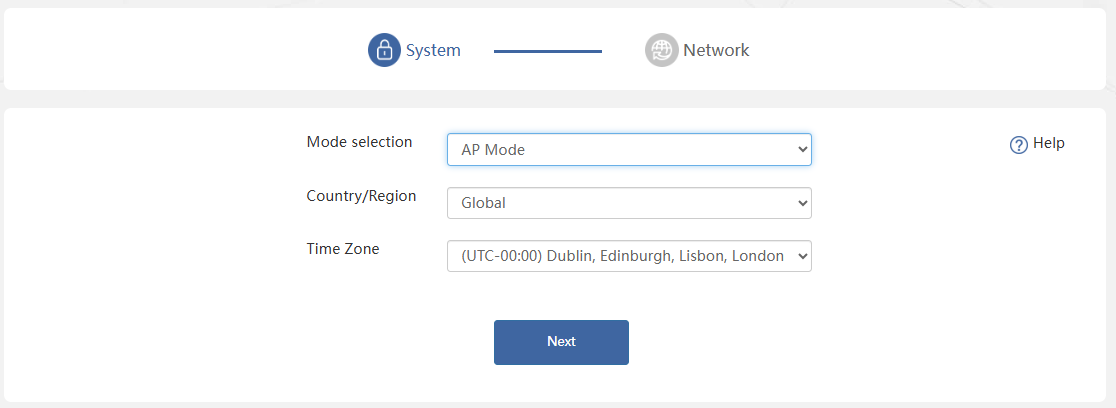
-
Connect the WAN port of this product to the PoE and connect the LAN DATA IN port of the PoE box to the host router via Ethernet cable.
-
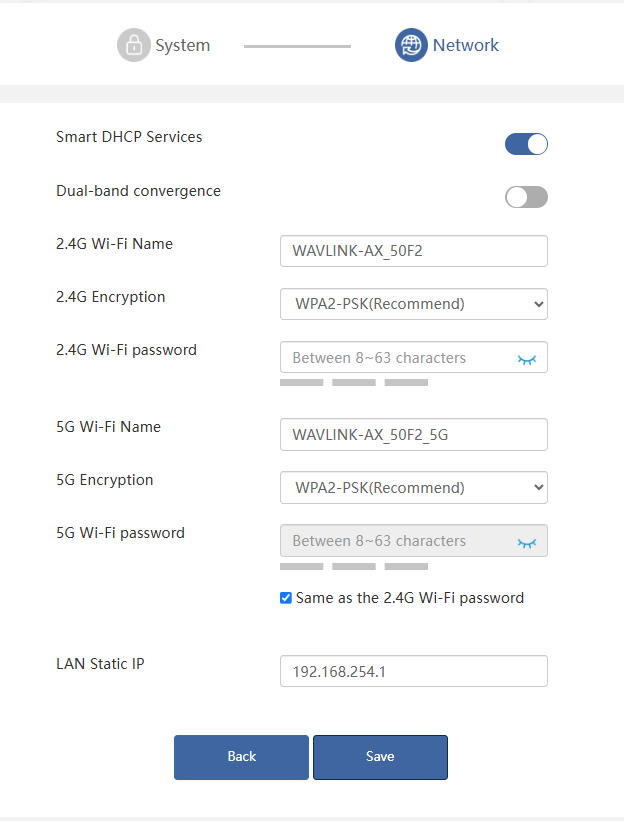
Then you can change the SSID or use the default one, the encryption mode recommend is WPA2-PSK. For your network security, please create a new Password according to the rule. Then click Save and wait for the setting process to complete.
Note
- For Smart DHCP Service: With smart DHCP service being enabled, if the upstream device is not been connected or the upstream device is unable to provide IP, the router will assign the IP automatically. If no automatic IP assignment is needed, it is recommended to disable it.
- If the configuration for this device is needed, entering http://waplogin.link to configure the setting if it is necessary.
Repeater Mode

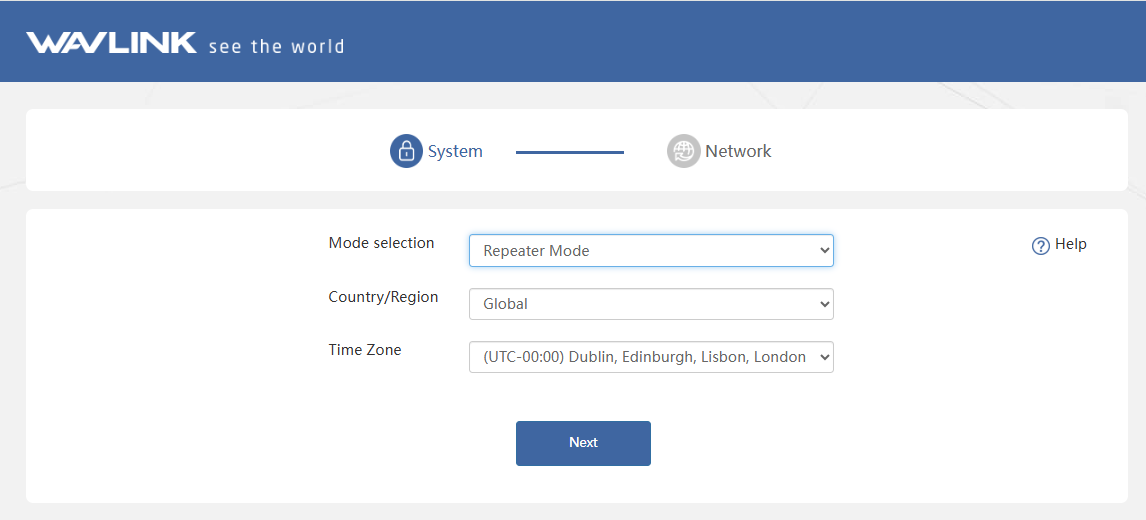
- Select Repeater Mode and click Next.
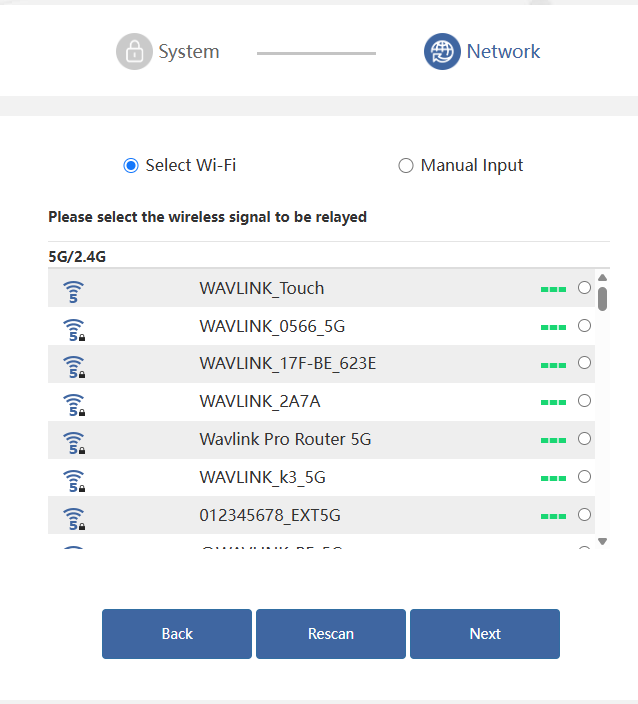
2.1 Select Wi-Fi
①. After scanning, please make sure the Wi-Fi you want to select is listed, and click Next, if it isn't, please click Rescan.
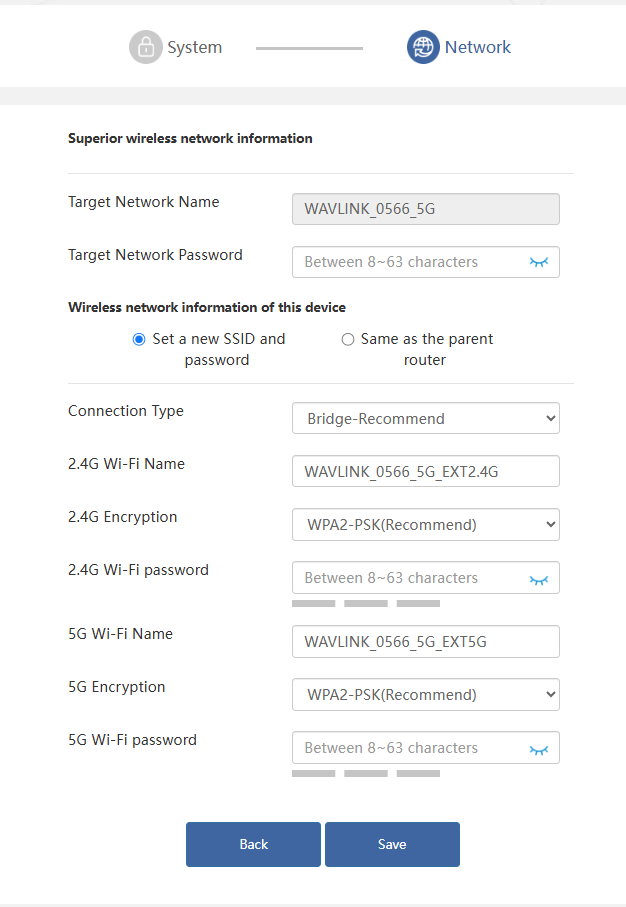
②. Enter the password for the wireless network that you have selected. Set the wireless network encryption mode and password for this device. Click Save.
2.2 Manual Input
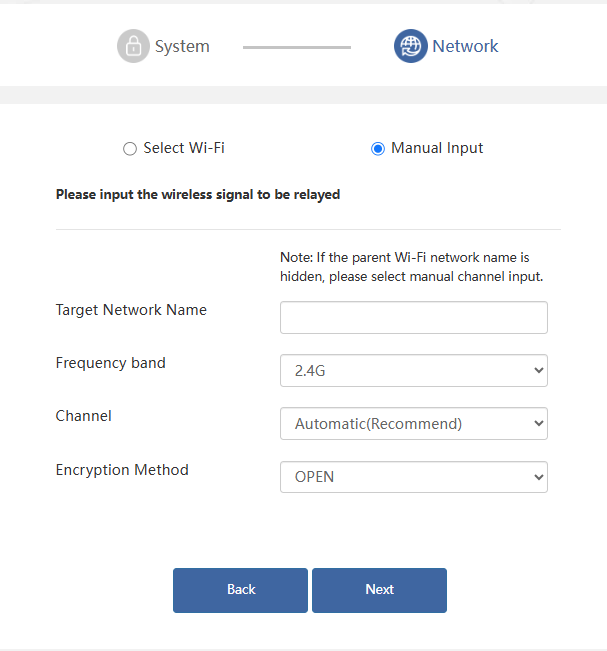
There is also an option to manually enter information about the superior wireless network that needs to be relayed.
① Manually add the wireless network you want to connect, enter the device information, and click Next.
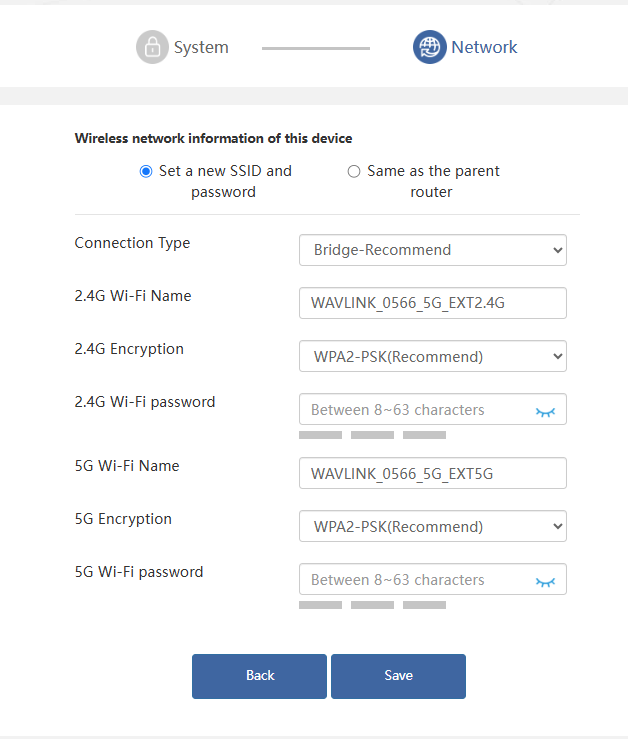
② Set the wireless network encryption mode and password for this device. Click Save.
Mesh Router Mode

Before configuring. please make sure your upper router has connected to the WAN port of this product.
- Choose Mesh Router Mode.Click Next.
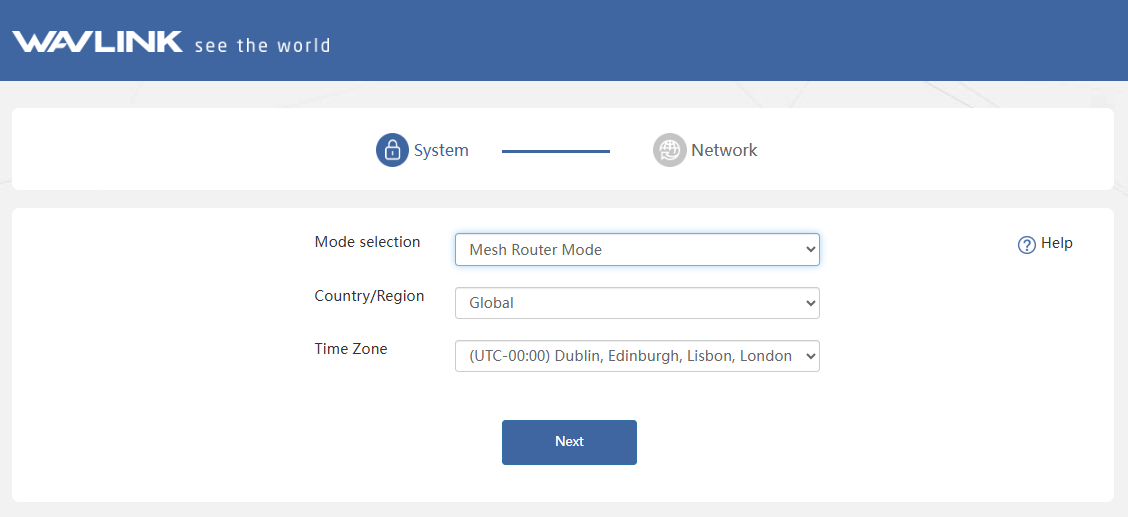
- Configure the corresponding WAN Type, SSID(Wi-Fi name), Encryption Method and Password, then click Save.
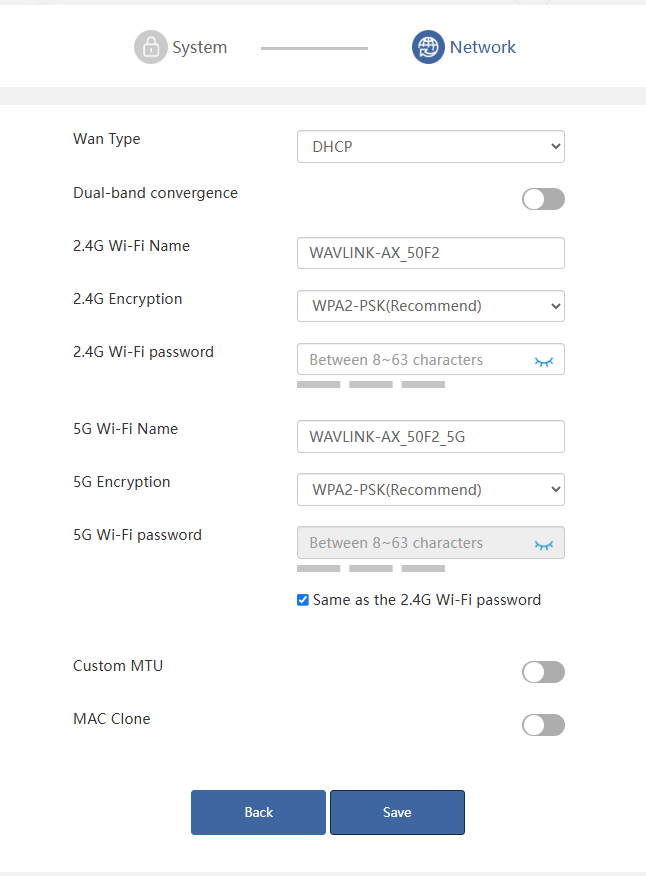
① If you choose DHCP, you will need to decide whether to enable the MAC clone. Some ISPs register the MAC address of your computer when you firstly access the Internet through their cable modem, we need to clone the MAC address of your computer to the router. The Custom MTU(Maximum Transmission Unit) is the largest size of a data packet that can be transmitted over the network. If your ISP requires you to adjust the MTU size, enable this option. Otherwise, we recommend you to keep it disabled for optimal network performance.
② If you choose PPPoE, enter the Username and Password provided by your ISP. PPPoE is usually designed for such as DSL or fiber optics.
③ If you choose Static IP, enter a specified IP parameters including IP address, Subnet Mask, Gateway, DNS1 and DNS2 provided by your ISP.
Mesh AP Mode

Before configuration, connect this product’s WAN port to the PoE. The PoE switch’s LAN port connects to the upper router. This mode also supports mesh topology, which means it can form a mesh network after pairing with other nodes.
- Select Mesh AP Mode,click Next.
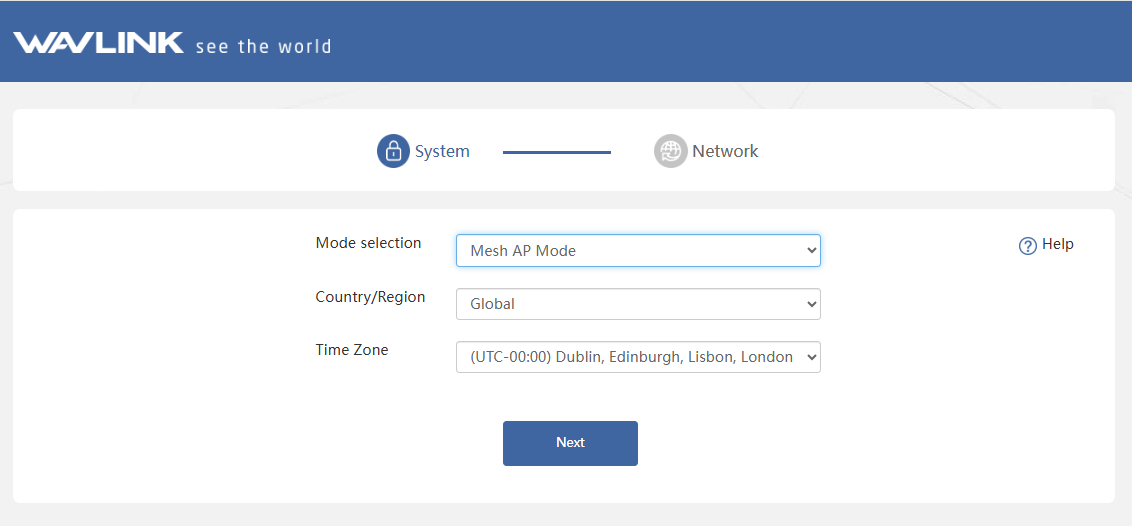
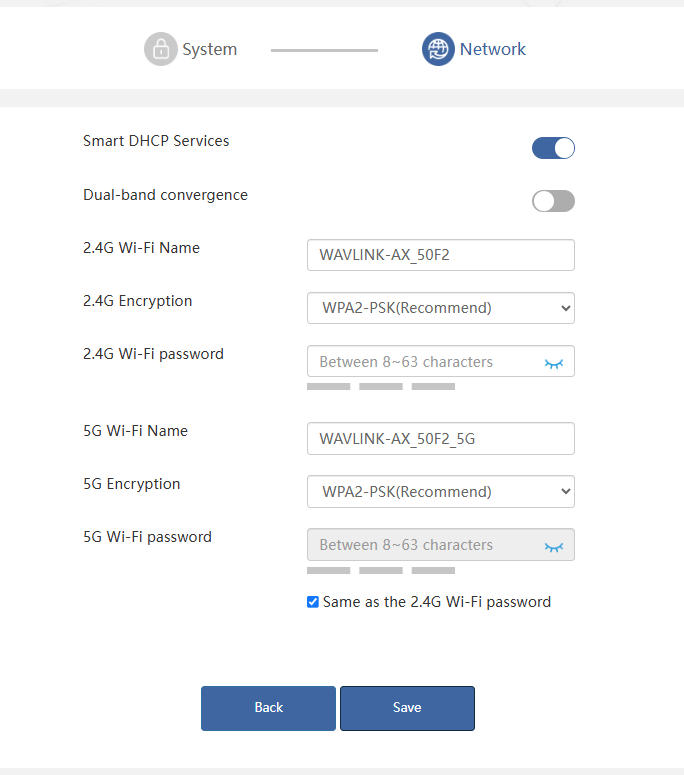
- You can change the SSID(WiFi Name) or use the default one. WPA2-PSK is recommended for the Encryption Method. For network security, it is recommended to create a new Password. Click Save, and wait for the configuration to complete.
Mesh Extender Mode

In this mode, the device enters a Mesh networking pairing state, making it discoverable for scanning and pairing by proximate primary devices waiting to establish a connection. If you have a router that supports WAVLINK Everything Mesh function, then you can build a mesh system with this mode.
- Select Mesh Extender Mode, click Next.
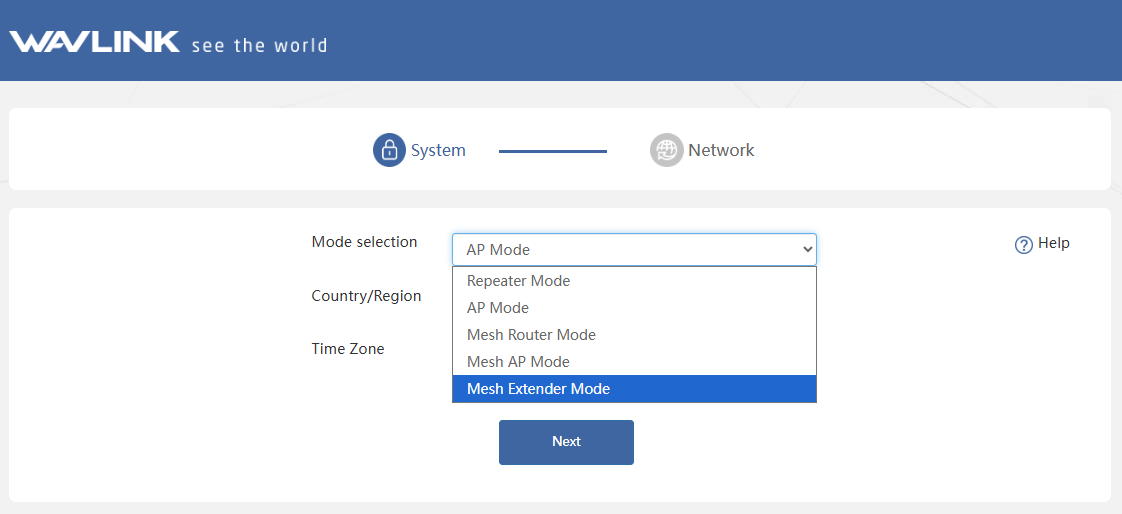
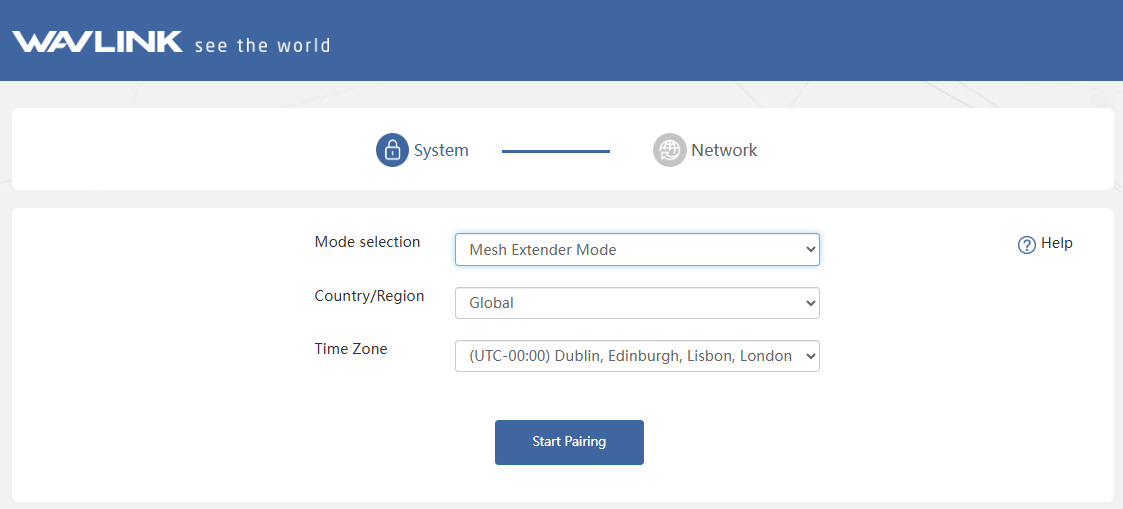
- Select your Country/Region and Time Zone.Click Start Pairing.
Note:
When the device enters the pairing state, please keep pressing the PAIR button 2s on the primary router or add the mesh device in the primary router configuration page, the pairing time is expected to be 2 minutes. If the pairing fails, check whether the primary router is set correctly, and then enable re-pairing via the pairing button or re-enter this device page. If you want to switch to another mode when you have successfully configured mesh extender mode, please reset this device.