Chapter 2 How to Use
This chapter contains the following sections:
HOW TO USE
Ensuring the driver has been installed before using this Docking Station.
1.Using the Docking Station Horizontally (Flat on a Desk)
The docking station comes with an adhesive plastic padding on the back, allowing it to sit flat on a table.
2.Using the Docking Station Vertically (With the Stand)
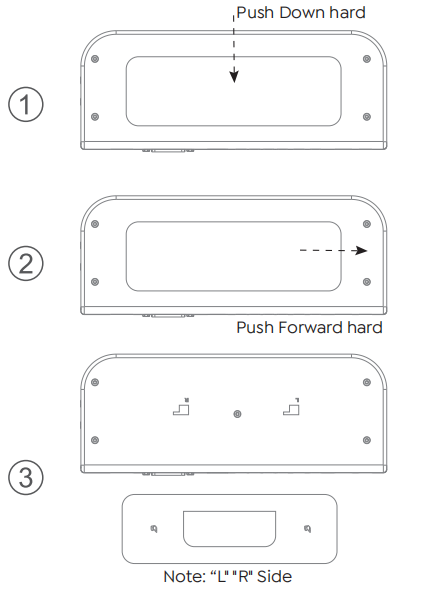
Note: If you plan to mount the docking station vertically using the stand, you’ll need to remove the adhesive pad first. To do so, press firmly on the center of the pad to loosen it, then slide it to the right until it comes off completely. (The pad is reusable—just clean it with water and let it dry thoroughly before reapplying.)
Please remove the plastic padding before clipping the docking station to the stand.
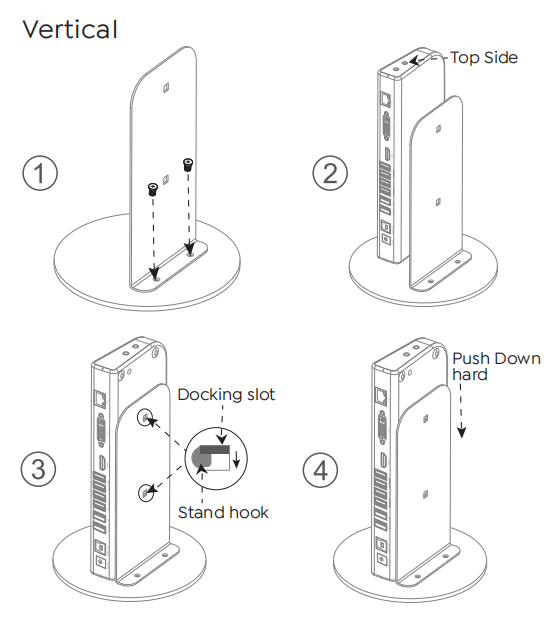
Step 1 Use a small screwdriver to secure the stand to the round bottom plate.
Step 2 Ensure that the Audio and Microphone output holes are facing upward.
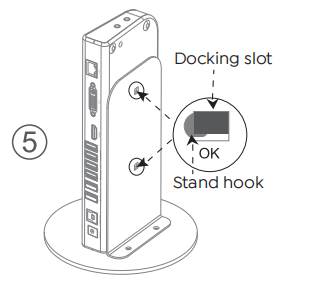
Step 3 Align the two slots on the back of the docking station with the hooks on the stand.
Step 4 Press the docking station down firmly until it snaps securely into place.
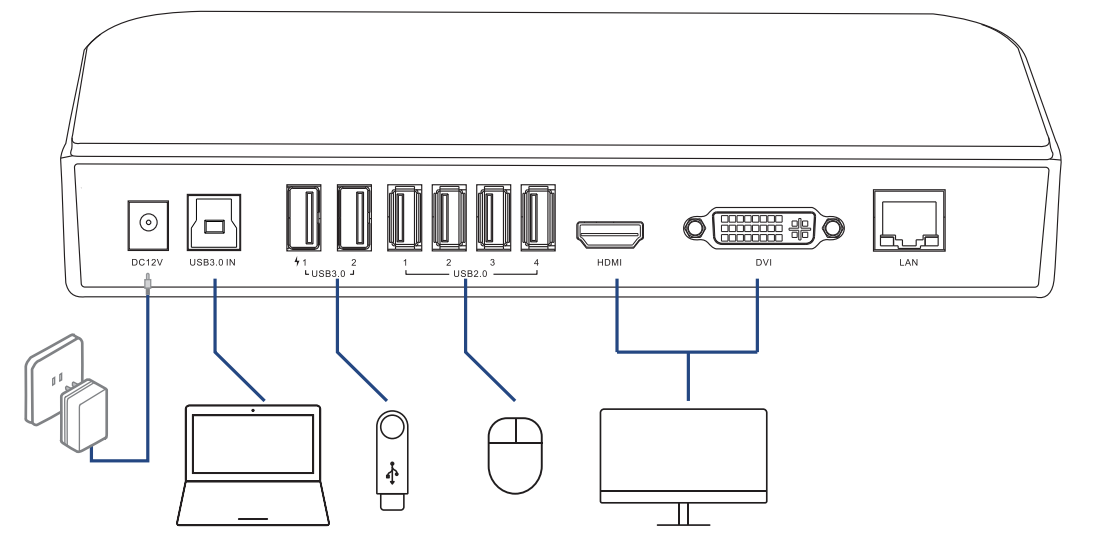
3.Connecting Peripherals
Step 1: Connect to Power
Connect the Power Adapter to the DC Power Port, then plug the Power Adapter into a power source.
Step 2: Connect to Your Laptop
Connect the USB 3.0 IN port on the Docking Station to your laptop via the provided USB 3.0 Type-A to Type-B Cable. Please use the provided USB-A to USB-C Adapter if your computer only has a USB-C port.
Step 3: Connect to Monitors
Connect the HDMI and DVI ports to monitors according to your needs.
Step 4: Connect to USB Peripherals
Connect USB peripherals to USB 2.0 or USB 3.0 ports according to your needs.