Chapter 3 Offline Clone
This chapter contains the following section:
Cloning of HDD
Use automatic replication function to CLONE hard disk
Pre-Use Confirmation
-
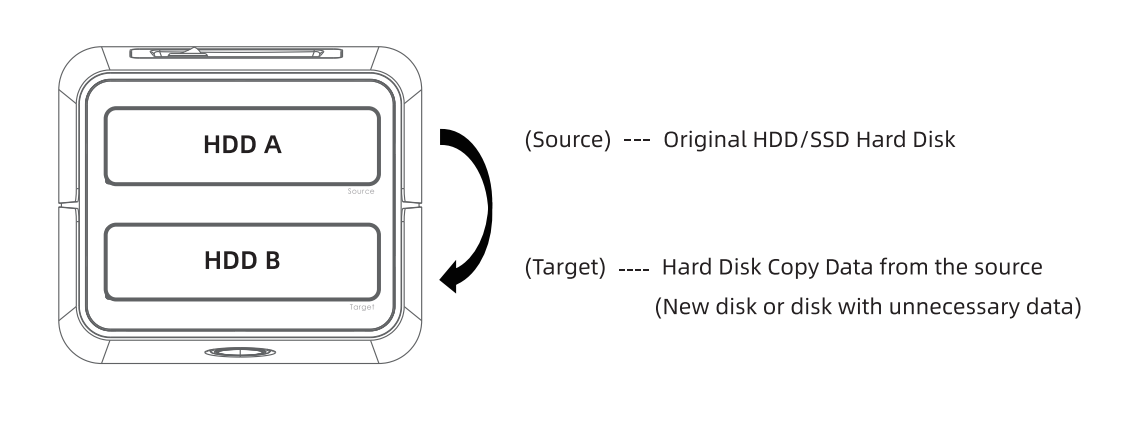
The automatic replication function of this docking station only supports from HDD A(copy source) to HDD B(copy target). Be sure to plug the original hard disk into the "HDD A slot".
-
HDD A (copy source: The original hard disk with the data that you want to copy)
-
HDD B (copy target: Hard disk that data is copied starting from the copy source)
- When using automatic replication function, HDD B (copy target) will be initialized and all data will be lost, so please make sure you don't have any important data in it before copying.

- When using automatic replication function, please select a hard disk with the same or larger capacity as HDD A (copy source) at HDD B(copy target).
The data can't be copied correctly to a disk with a smaller capacity than HDD A(copy source).
Case

-
The data can’t be copied properly if the hard disk at the copy target is damaged. CLONE will fail if the hard disk (HDD B) at the copy target is used before and part of the sector is broken, so it’s better to use a new hard disk.
-
If the hard disk is used, check the hard disk with your computer after copying and keeping the original hard disk as the copy source until you are sure that the copy is complete. Do not delete or format data.
-
After self-replication, HDD B has the same partitions and unallocated space as HDD A. If you want to use the full capacity of HDD B, you can use partition management software on your computer to increase the capacity of the last partition or format it as a new drive.
1.Final drive space expansion
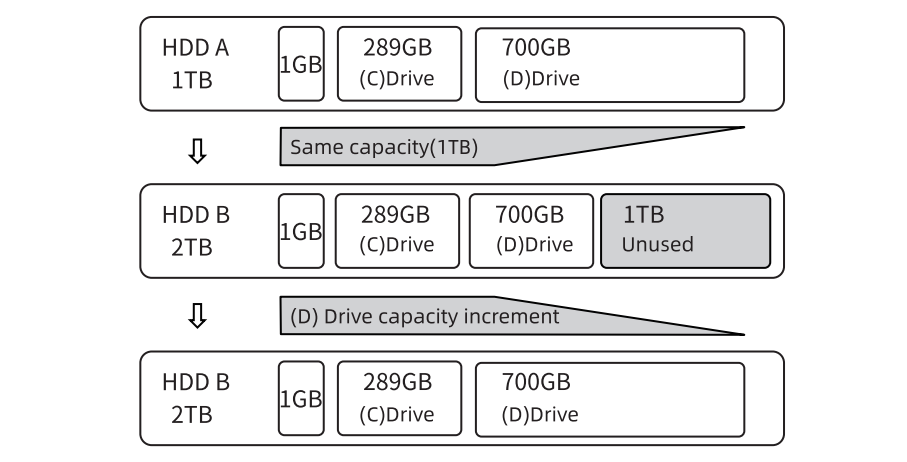
2. Append new driver

Start CLONE
This WL-ST334UA only supports offline cloning. Cloning connected to a computer is not allowed
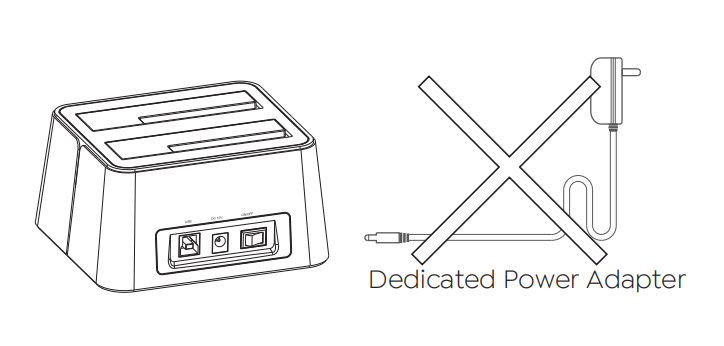
Step 1: Make sure the power is off
Please unplug the DC power adapter.
Note: The HDD/SSD plugging/unplugging under power supply will damage the HDD/SSD.
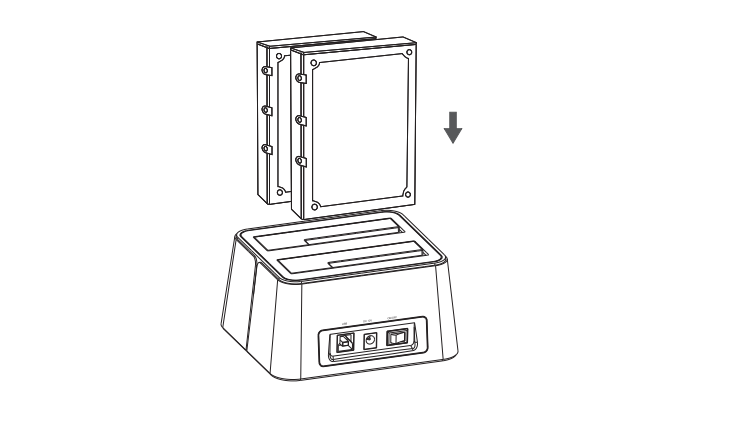
Step 2: Install the HDD/SSD
Place the connector of HDD down in line with the SATA connector of the device, vertically and slowly insert the HDD/SSD to slot until it sticks.
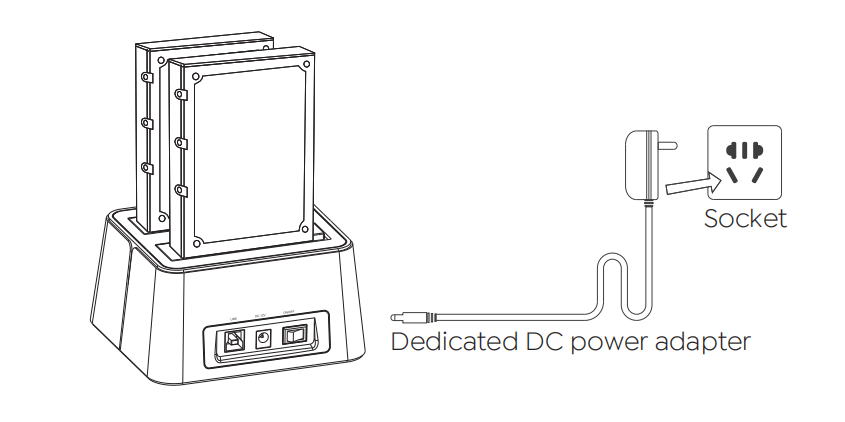
Step 3: Connect the DC adapter (power adapter)
Connect the dedicated DC power adapter and switch the power of device to “on” to turn on the power.
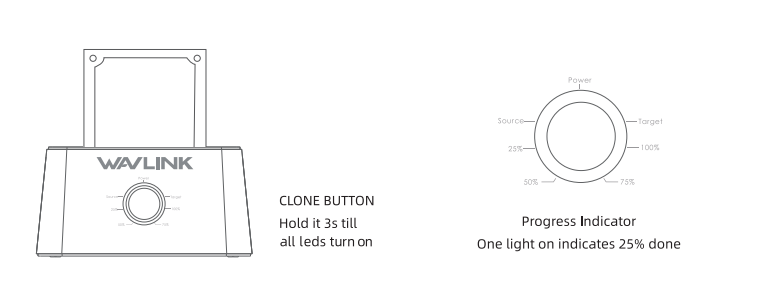
Step 4: Start Clone
Hold the CLONE button for about 3 seconds, when all leds turn on, the clone progress will start.
The device then starts copying the hard disk. You can see the progress through four indicator lights ( 25%, 50%, 75%, 100% ).
(One light on indicates 25% done.)
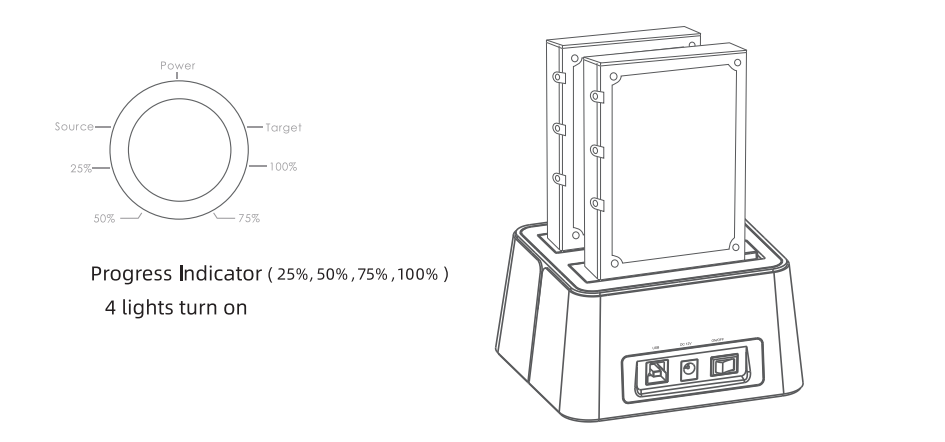
Step 5: CLONE Complete
When the automatic replication is completed, four lights ( 25%, 50%, 75%, 100% ) turn on.
Attention:
When the automatic replication is completed, you can connect the docking station and the computer with USB cable, then HDD A and HDD B will be automatically identified as removable disks of the computer.
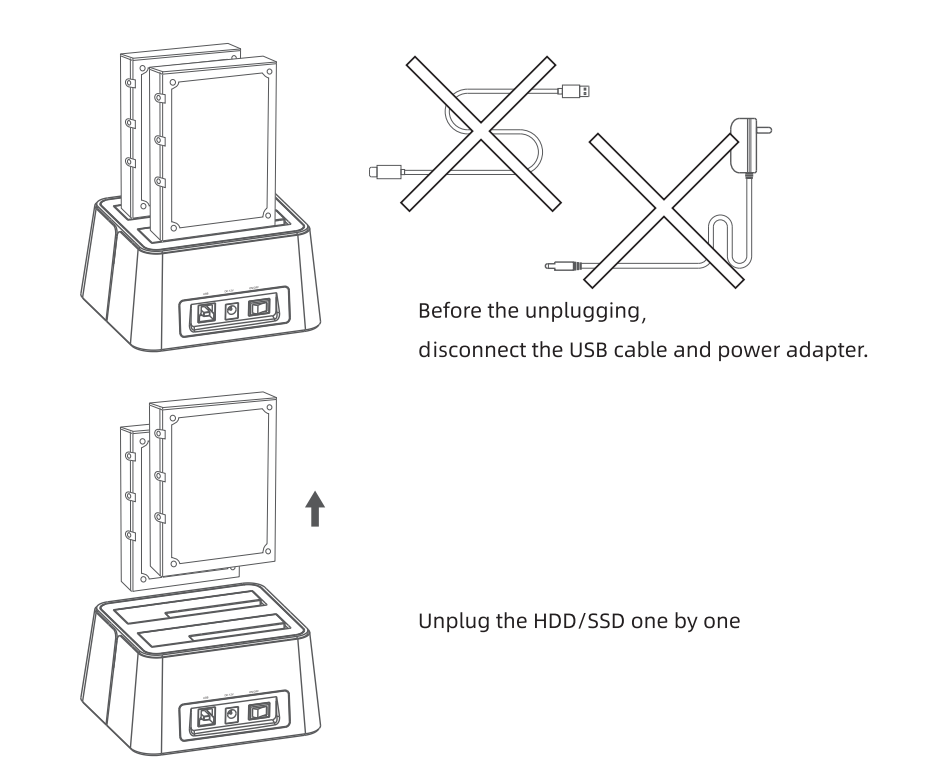
Step 6: Unplugging steps after CLONE
①Set the power switch of the product to "off".
②Disconnect the USB cable and dedicated DC power adapter.
③Unplug the HDD/SSD disk one by one from the docking station.
Attention:
To prevent disk damage or accidents, please don't plug or unplug HDD/SSD until the power is turned off and the DC power adapter is disconnected