Chapter 1 Basic Information
This chapter introduces the docking station's appearance and some basic information.
It contains the following sections:
• OVERVIEW
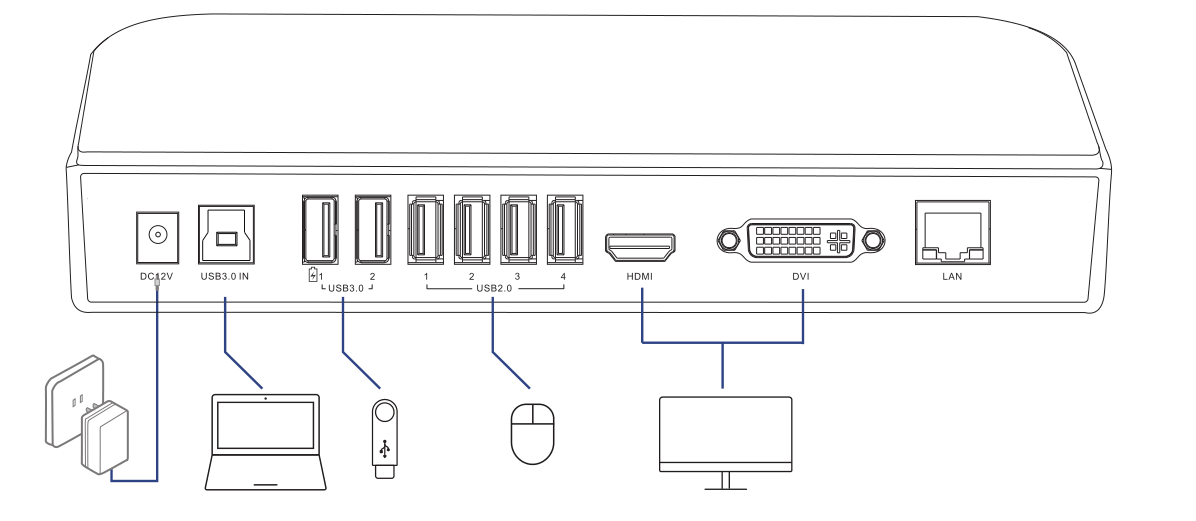
OVERVIEW

① Headphone Output
② Microphone Input
③ Gigabit LAN
④ DVI Port
⑤ HDMI Port
⑥ 4xUSB 2.0 Port
⑦ USB 3.0 Port
⑧ USB 3.0 IN
⑨ DC Power Jack
SYSTEM REQUIREMENT
-
Computer screen for use with the device.
-
Requires supported Intel/AMD/NVIDIA main GPU and WDDM-compatible driver (most recent systems meet this requirement).
-
Ethernet port requires full-duplex network infrastructure.
-
Updated USB 3.0 host controller drivers and graphics drivers suggested for best performance and compatibility.
-
Windows XP (32-bit only) SP3 Visa/7/8 and latest, Mac OS 10.6 and latest. (64-bit editions of XP are not supported.)
-
Windows 10, 8.1, 7, and XP drivers can be automatically installed by Windows Update (with an existing internet connection) or can be downloaded from www.wavlink.com
HOW TO USE
Ensure the driver has been installed before using this docking station.
Detailed driver installation operation can be seen at the part of DRIVER INSTALLATION.
Step 1: Connect to Power
Connect the power adapter to the DC 12V power port, then plug the power adapter into a power source.
Step 2: Connect to Your Laptop
Connect the USB 3.0 IN port on the docking station to your laptop via the provided USB 3.0 Type-A to Type-B cable. Please use the provided USB-A to USB-C adapter if your computer only has a USB-C port.
Step 3: Connect to Monitors
Connect the HDMI and DVI ports to monitors according to your needs.
Step 4: Connect to USB Peripherals
Connect USB peripherals to USB 2.0 or USB 3.0 ports according to your needs.