Chapter 2 Assemble and Connection
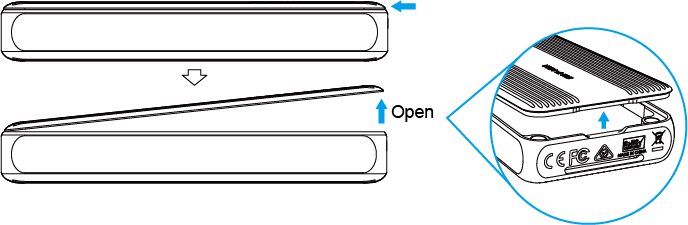
- Lift the top magnetic cover of the enclosure from its rear end.
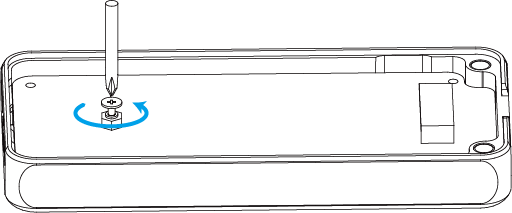
- Unscrew the screws counterclockwise using the screwdriver.
- At a 45-degree angle, slide in your SSD until it is firmly installed. Align the screw with the mounting interface on the SSD and screw it into place clockwise using the screwdriver.
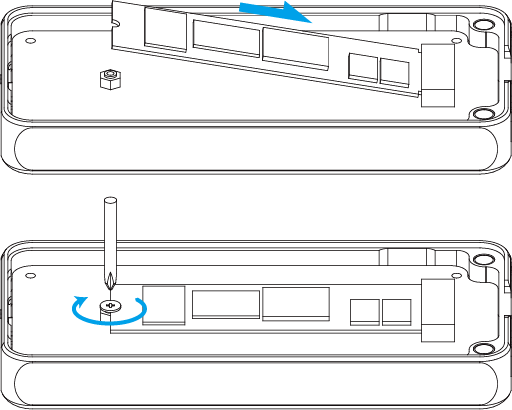
- After installing the SSD, peel off the protective films on both sides of thermal silicone pad and stick it to the SSD.

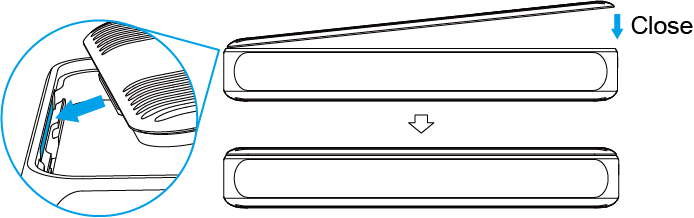
- To reassemble the cover, insert the protruding latch of the upper cover into the lower shell's fixing position at a 45-degree angle, then gently lower the opening until the
upper and lower covers snap together.
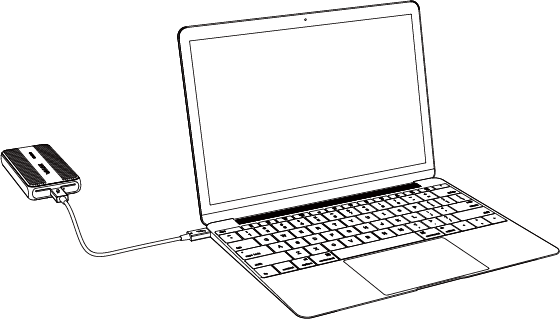
- Connect the Thunderbolt™ 5 port on the enclosure to the Thunderbolt™ 5 or USB4 v2 port of your computer with the equipped Thunderbolt™ 5 cable.The green flashing LED indicates the data is transferring.
Note:
- After assembling the SSD, use it directly after connecting the cable to the downstream port on the computer.
- Do not disassemble the SSD while it's connected to the computer, as this may damage the device or cause data loss.