Chapter 2 How to Use
This chapter contains the following sections :
Video Guide
Product Connection
- Plug the product into a power outlet.
- Turn on the power button, then use the device wirelessly or via an Ethernet cable.
2.1 Cable Connection
Connect one end of the Ethernet cable to the WAN/LAN port on the product, and other end to the laptop.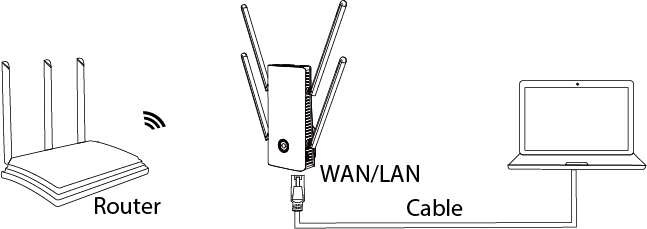 2.2 Wireless Connection
Power on the product and search SSID of the product on the wireless devices(smartphone, tablet PC, laptop, etc.) then click to connect.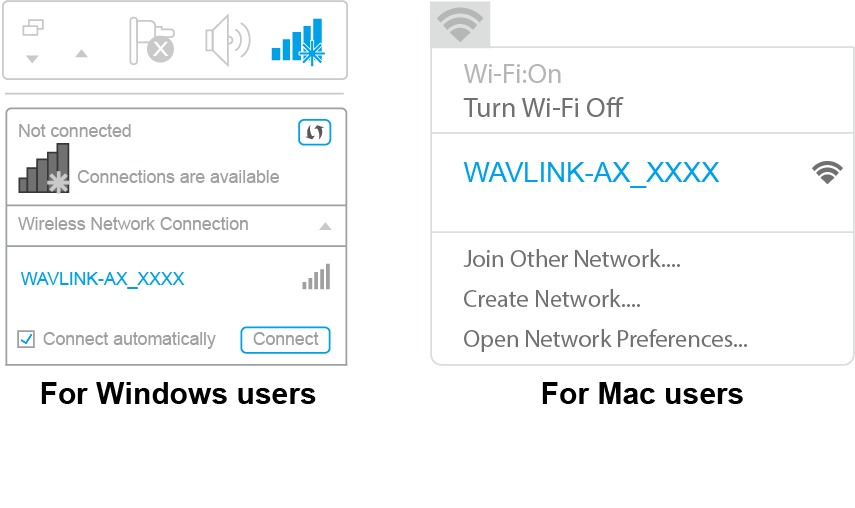
Configuration Wizard
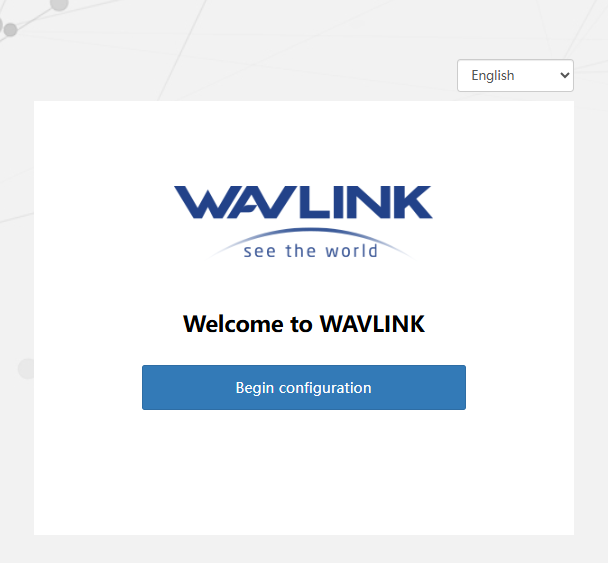
- After connecting to the device successfully in the first time, the login web UI will pop up to guide you to configure the product. If it doesn't, open a web browser and enter http://waplogin.link or 192.168.10.1 in the address bar(not search bar) of the browser on PC/laptop or phone.
 Note: If you unable to access to the web-based setup page, please get solution from FAQ:Q2.
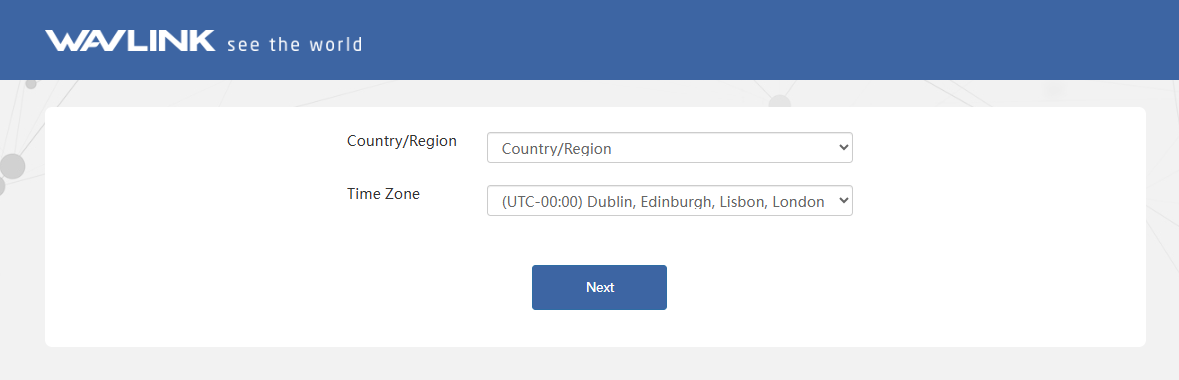
 - Select your Country/Region and Time Zone. Then click Next.
3. Mode Selection
The product has four modes, and selects repeater mode by default.
3.1 Repeater Mode
Any Wi-Fi signal network can be extended through wireless.
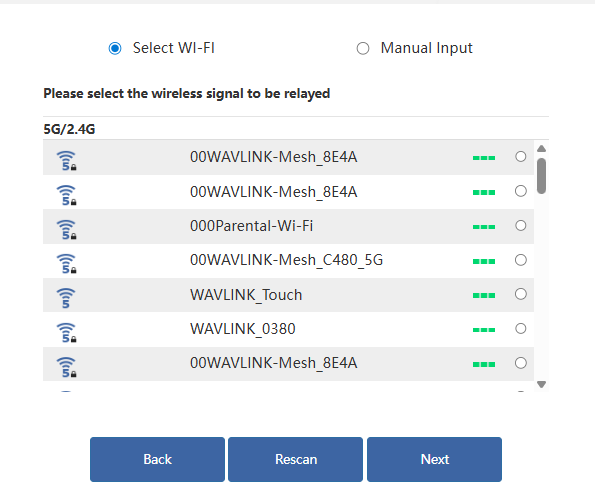
3.1.1 Selecting Wi-Fi:
-
After scanning, please make sure the Wi-Fi you want to select is listed, and click Next, if it isn't, please click Rescan.
-
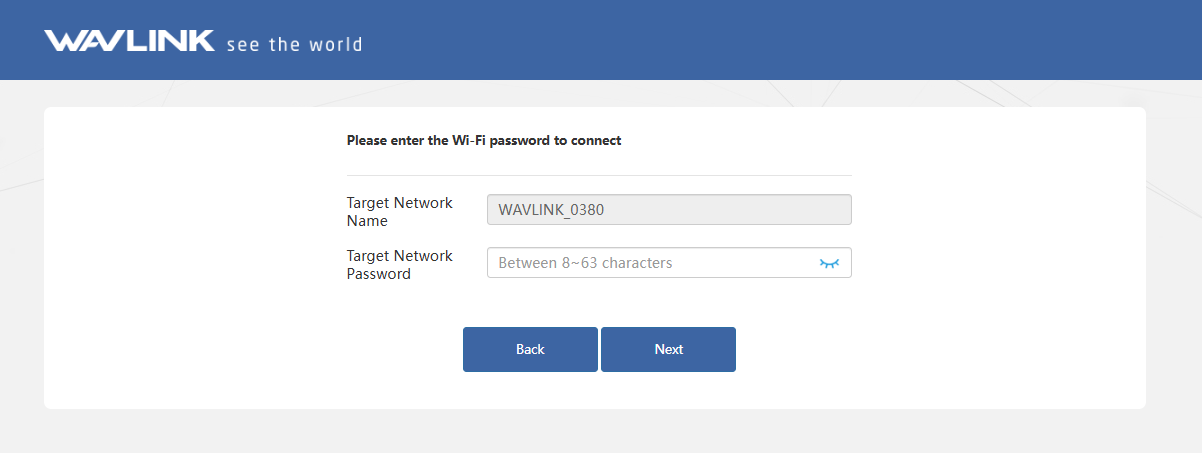
Enter the Target Network Password of the selected superior wireless network.
-
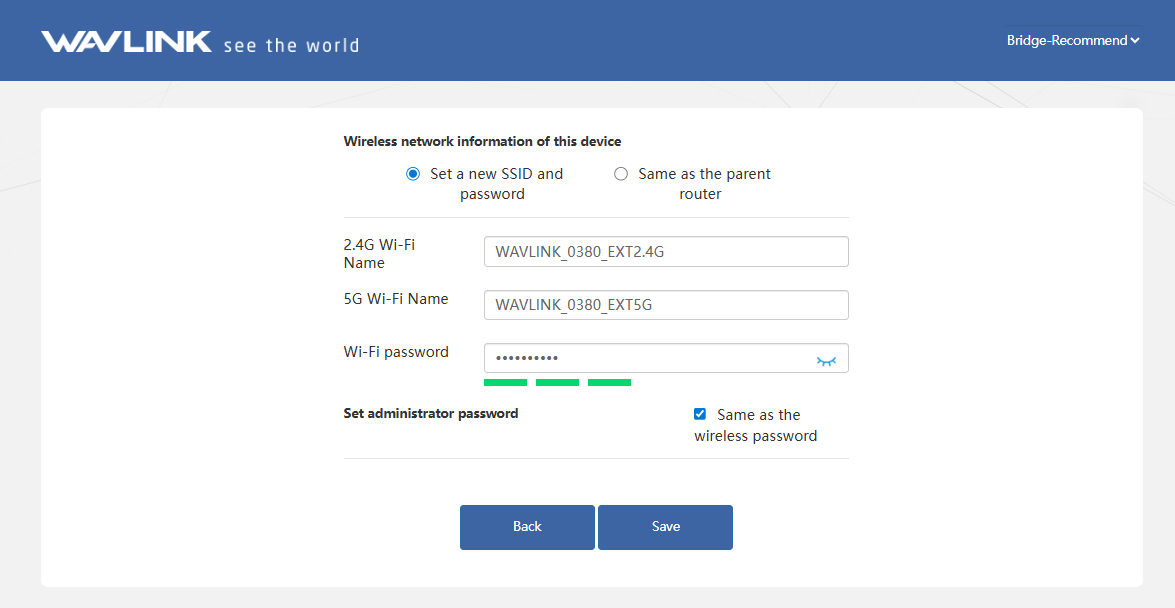
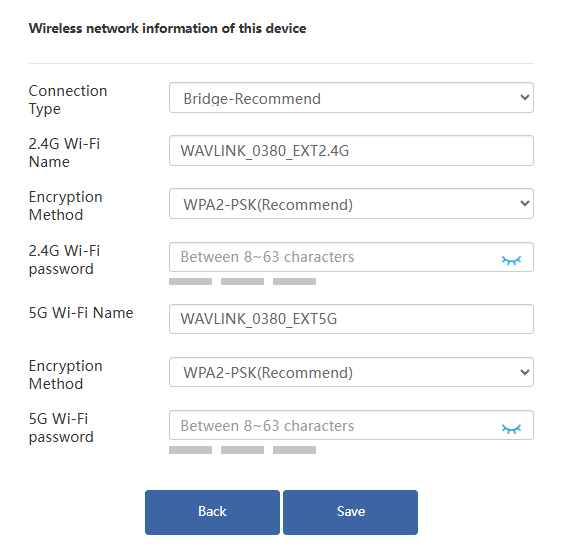
Set the Wi-Fi Name and Wi-Fi password of this device. Do not tick Same as the wireless password to keep the Wi-Fi password separate from the management password if it is needed. Then click Save.
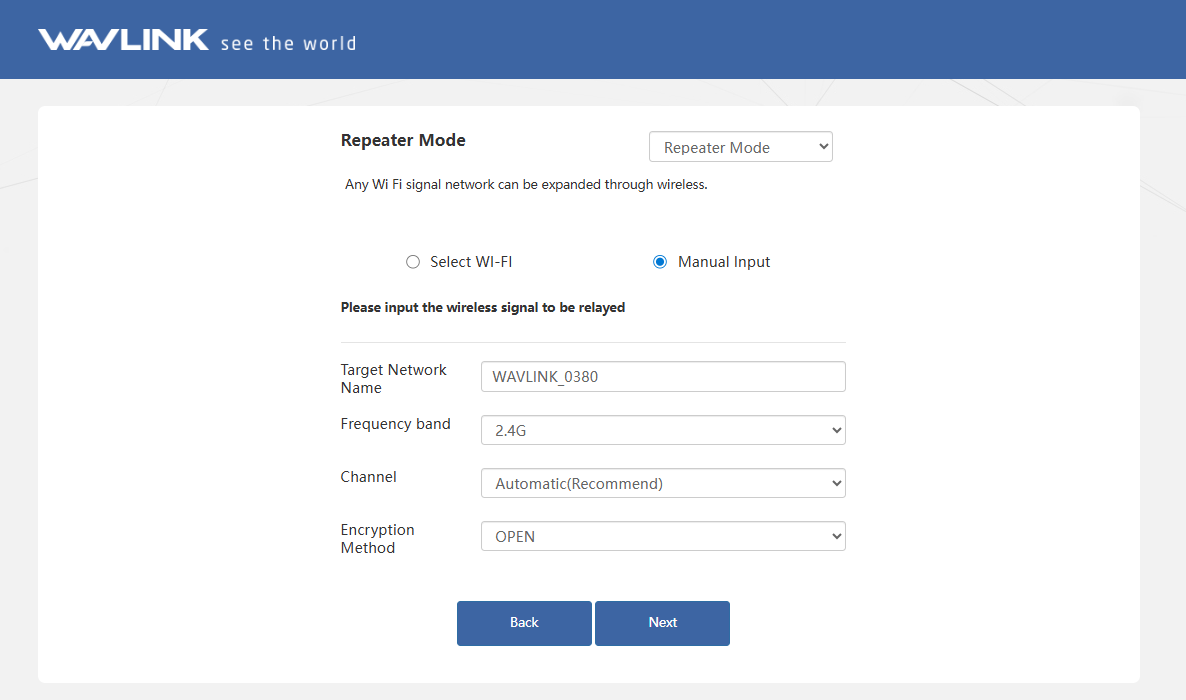
3.1.2 Manual Input:
There is also an option to manually enter information about the superior wireless network that needs to be relayed.
- Manually add the wireless network you want to connect, enter the device information, and click Next. For the network security, it is recommended to set a password.
- After completing the inital setup, click Advanced > Mode Selection to modify the Connection Type to Gateway Mode/Bridge Mode when reconfiguring the repeater mode(Optional).
 Note for Connection Type
Gateway Mode: Functions as a wireless LAN access point(AP). It can relay signals from any wireless network. This mode features DHCP service functionality and operates on a different IP subnet from the upstream device, enabling management of IP address allocation for connected devices.
Bridge Mode: This mode can relay signals from any wireless network but does not provide DHCP service. IP addresses are managed by the upstream device. After successful relaying in this mode, access the device configuration page via http://waplogin.link/ if settings adjustment is required.
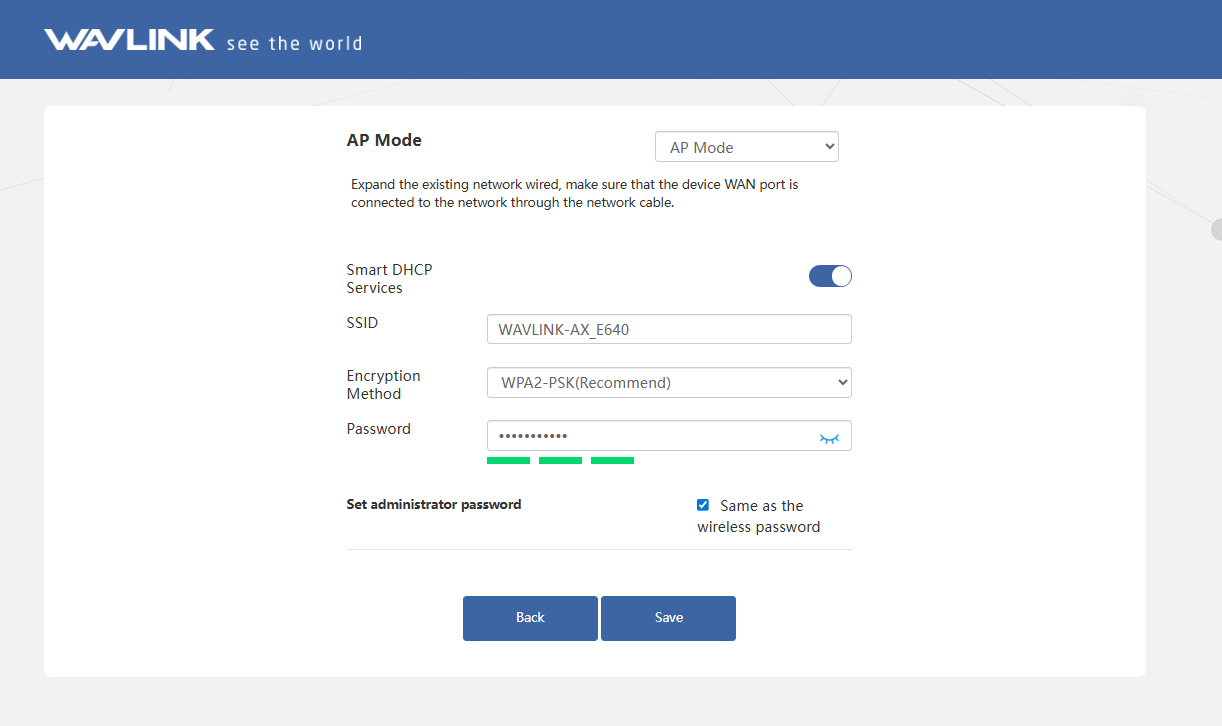
3.2 AP Mode
To extend an existing network via wired connection, connect the WAN/LAN port of the device to the LAN port of the upstream router.
-
Choose AP Mode.
-
Configure the SSID(Wi-Fi name), Encryption Method, and Password as your needs, do not tick Same as the wireless password to keep the Wi-Fi password separate from the management password if it is needed.
3.3 Mesh Router Mode
Converts the ISP's wired network into a Wi-Fi signal for both wireless and wired Internet access. Meanwhile, this mode supports mesh networking, and you can set this mode to pair sub-routers to form a network.
-
Make sure you have connected the WAN/LAN port of this product to the upper router before configuring.
-
Choose Mesh Router Mode, configuring the corresponding WAN Type, SSID(Wi-Fi name), Encryption Method and Password, then click Save.
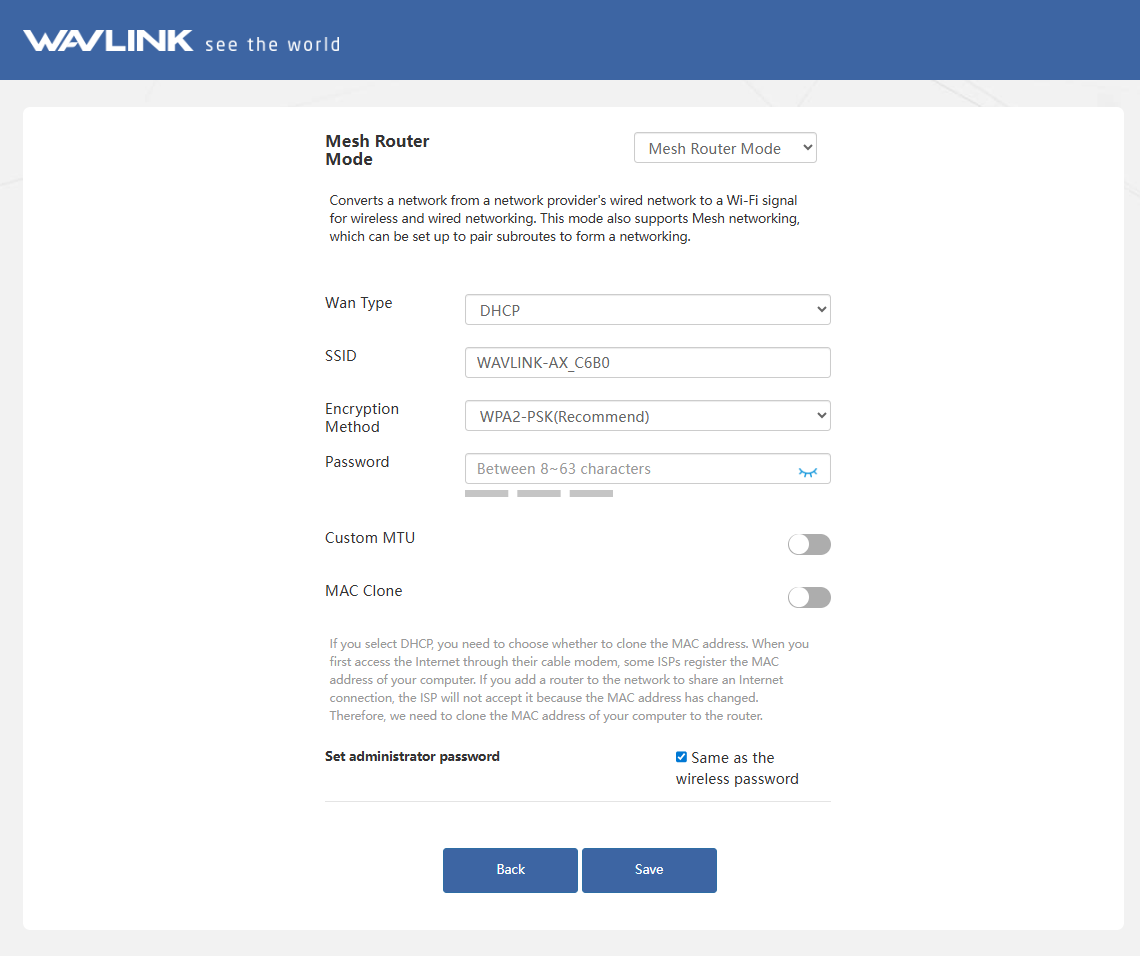
Which WAN Type am I supposed to choose?
① If you choose DHCP, you will need to decide whether to enable the MAC clone. Some ISPs register the MAC address of your computer when you firstly access the Internet through their cable modem, we need to clone the MAC address of your computer to the router. The Custom MTU(Maximum Transmission Unit) is the largest size of a data packet that can be transmitted over the network. If your ISP requires you to adjust the MTU size, enable this option. Otherwise, we recommend you to keep it disabled for optimal network performance.
② If you choose PPPoE, enter the Username and Password provided by your ISP. PPPoE is usually designed for such as DSL or fiber optics.
③ If you choose Static IP, enter a specified IP parameters including IP address, Subnet Mask, Gateway, DNS1 and DNS2 provided by your ISP.
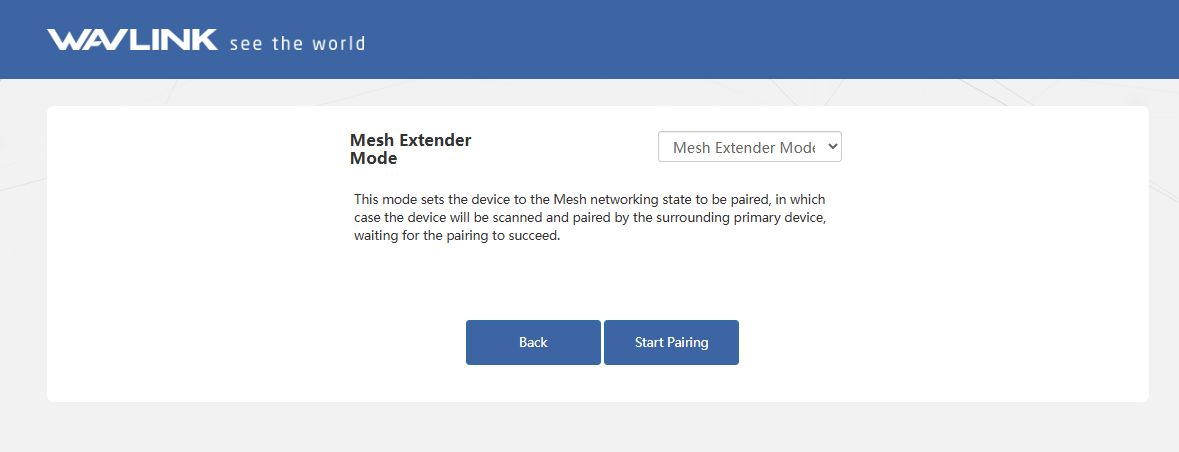
3.4 Mesh Extender Mode
In this mode, the device enters a Mesh networking pairing state, making it discoverable for scanning and pairing by proximate primary devices waiting to establish a connection.
- Select Mesh Extender Mode, then click Start Pairing.